Tilesets and Tilemaps
Tilesets and tilemaps are useful for game maps, ground pieces, isometric scenes, hex maps, and artwork built from reusable small tiles. You prepare a set of tiles first, then paint a scene on a tilemap layer.
Tileset and tilemap features are available in DA 1.32.0, iOS R59, and later.
Want to try the tileset and tilemap workflow directly? Visit Example Files to get official Tileset / Tilemap example files.
Tiled Mode previews how artwork repeats, which is useful for seamless textures and looping backgrounds. Tilemap layers are for building an actual map from tiles. The names are similar, but the workflows are different.
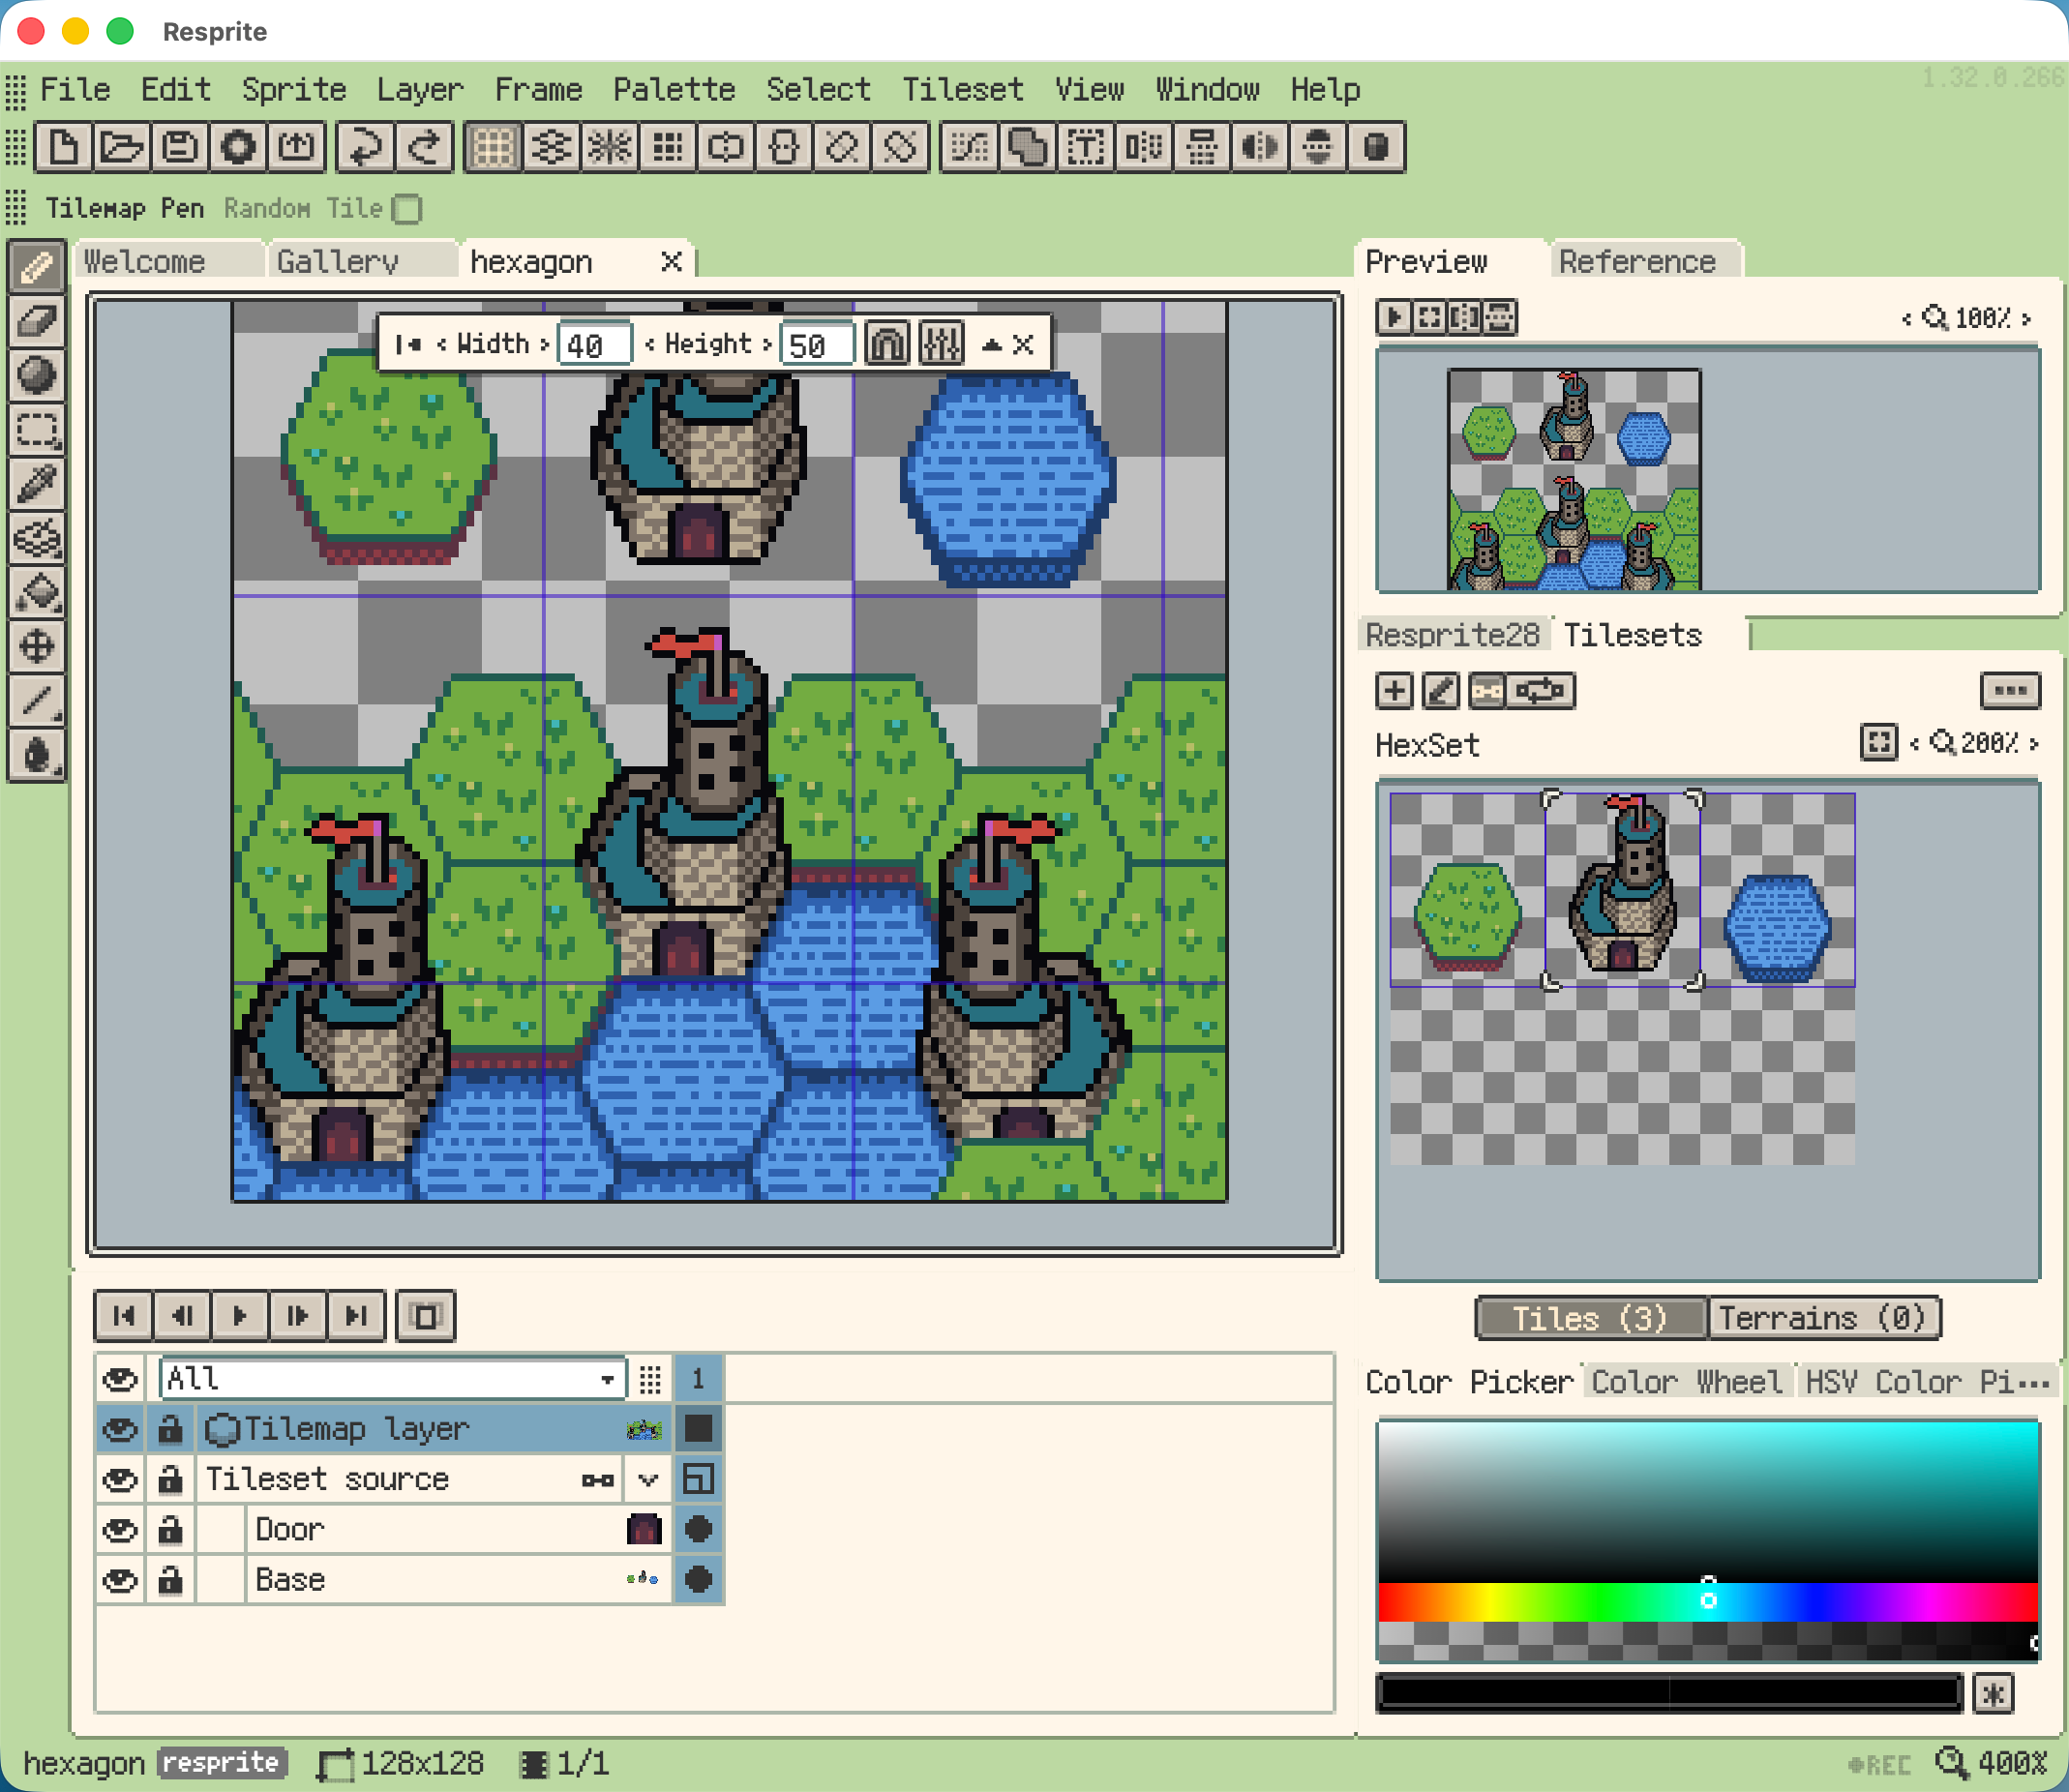
Good Use Cases
Tilemaps are well suited to artwork with repeated elements and layouts that need to change often, such as:
- game floors, walls, roads, water edges, and platforms;
- isometric rooms, city scenes, and building pieces;
- hex maps, boards, and strategy-game scenes;
- background or level sketches built from repeated material;
- map assets exchanged with Tiled or game development toolchains.
If you only want to check whether an image repeats seamlessly, use Tiled Mode Preview. If you want to edit a full map made from small tiles, use tilemap layers.
Basic Workflow
A common tilemap workflow is:
- Prepare a tileset from an image, a tileset package, or a layer in the current document.
- Create a tilemap layer and choose a rectangular, isometric, or hexagonal grid.
- Select tiles in the Tilesets panel, then paint on the canvas.
- Adjust the map with selection, fill, eraser, and eyedropper tools.
- Use terrain rules to paint connected areas more efficiently and keep edges consistent.
- Export an image or export a Tiled map when needed.
Prepare a Tileset
A tileset is a set of small tiles that can be reused across a map. After opening a document, use Tileset ▸ Add Tileset or the add menu in the Tilesets panel to import or create one.
Common sources include:
- From Image: create a tileset from a PNG or other image.
- From Tileset Package: import a Resprite
.restiletileset package. - From Tiled TSX: import a Tiled
.tsxtileset file. - Link Current Layer: use the current normal layer as a linked tileset source.
- From Tileset Library: load a tileset saved in the local tileset library.
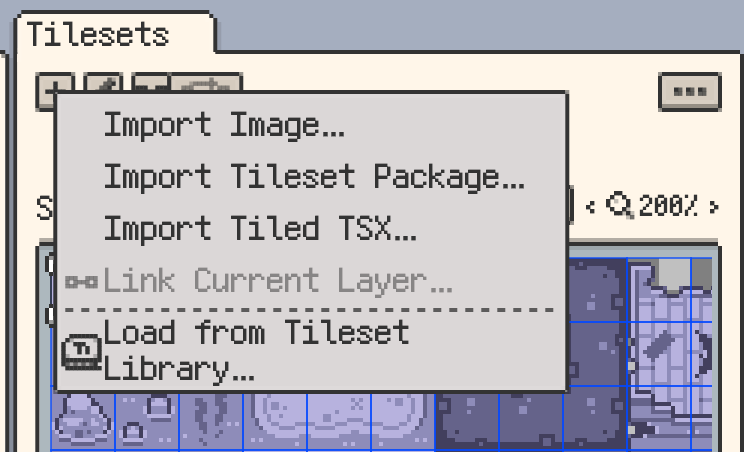
When creating a tileset from an image, confirm the tile width, tile height, margin, spacing, and column settings. Most ground tiles only need the tile size to match the image grid. For treetops, walls, isometric objects, or other tiles that extend beyond the grid cell, adjust base size and offset so the tile lands naturally on the map.
Create a Tilemap Layer
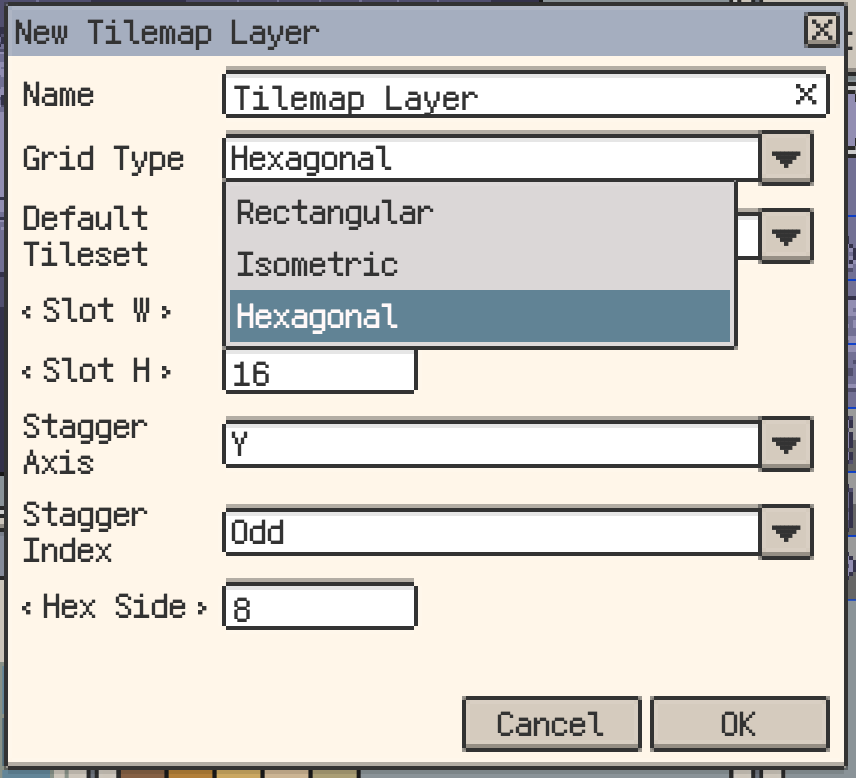
In the timeline layer menu, choose New Tilemap Layer to create a tilemap layer.
The main options are:
- Name: the layer name.
- Grid Type: rectangular, isometric diamond, or hexagonal.
- Default Tileset: the tileset used by this layer by default.
- Slot Width / Slot Height: the size of each map cell.
- Stagger Axis / Stagger Index / Hex Side Length: layout options used by hexagonal tilemap layers.
These hexagonal options are usually only needed when making a hex map. If you are not sure, keep the defaults.
After confirmation, Resprite creates the tilemap layer and opens the Tilesets panel so you can start painting.
Paint and Edit the Map
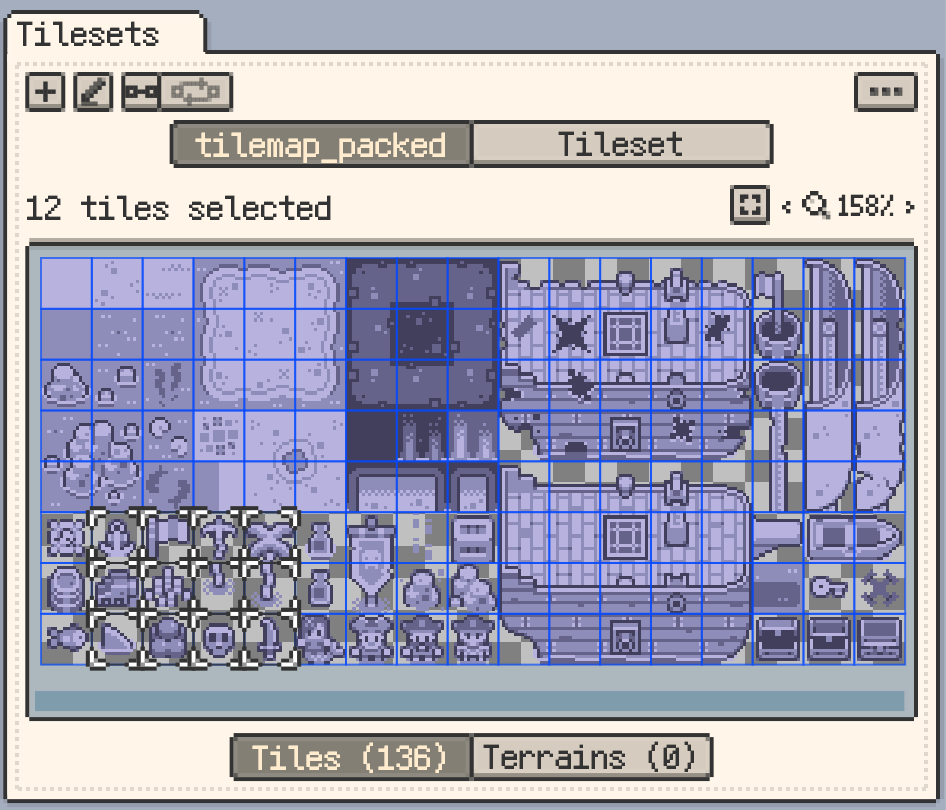
When a tilemap layer is selected, the Tilesets panel becomes the source for the current brush. You can select one tile, or drag-select multiple tiles to paint a larger tile pattern at once.
Common tool behavior:
- Pencil: places the current tile, tile pattern, or terrain.
- Eraser: clears tiles from cells.
- Fill Tool: fills areas by tilemap cells.
- Eyedropper: samples an existing tile or terrain from the canvas.
- Rectangular Selection: selects a map area for copy, cut, delete, move, flip, or rotate operations.
Painting on a tilemap layer changes which tile is used in each cell. It does not directly edit the tileset image. To change the tile artwork, edit the source image or use the linked tileset workflow below.
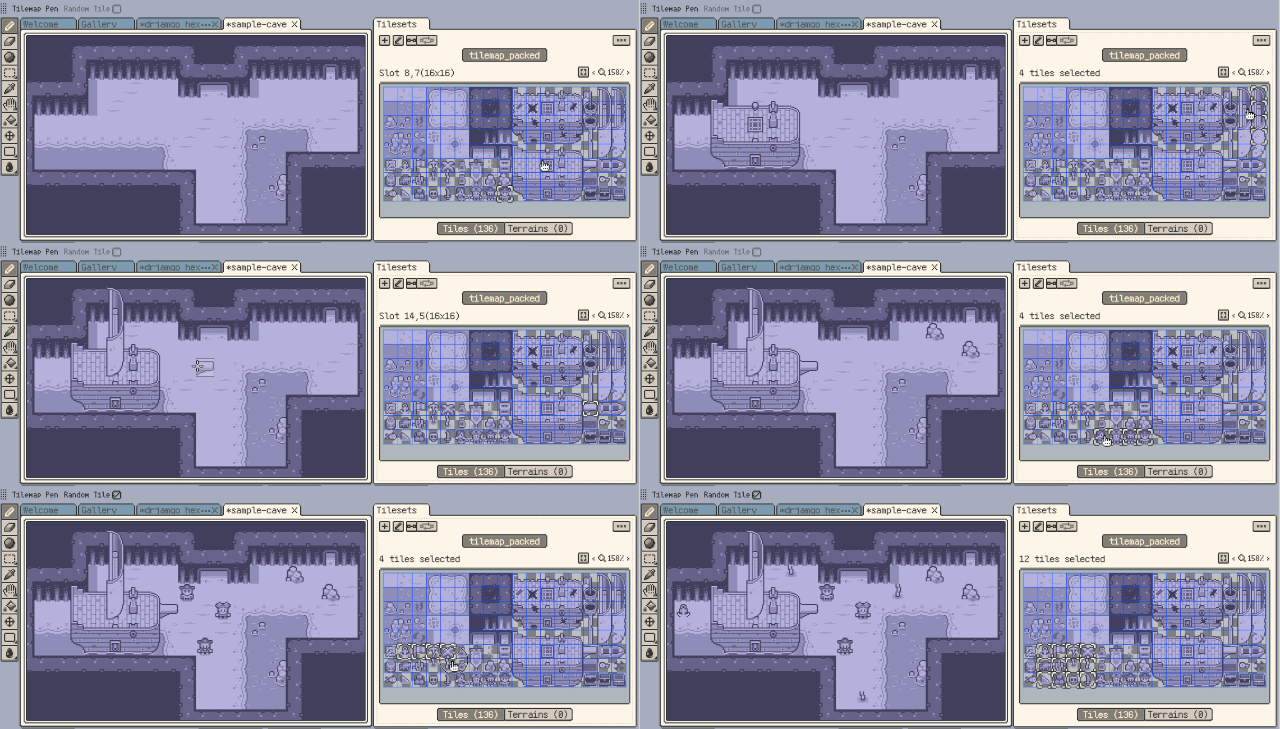
The tileset artwork shown above uses assets from Kenney's 16 × 16 pixel pack Monochrome Pirates, released under the Creative Commons CC0 1.0 Universal public-domain dedication.
Select, Move, and Transform
Selections on tilemap layers work by cells. You can select a map area, copy it elsewhere, or drag it to adjust the layout.
Common operations include:
- selecting a map area;
- deleting the tiles inside the selection;
- copying, cutting, and pasting a selected area;
- dragging the selection to a new position;
- flipping or rotating the selection to quickly build mirrored or rotated structures.
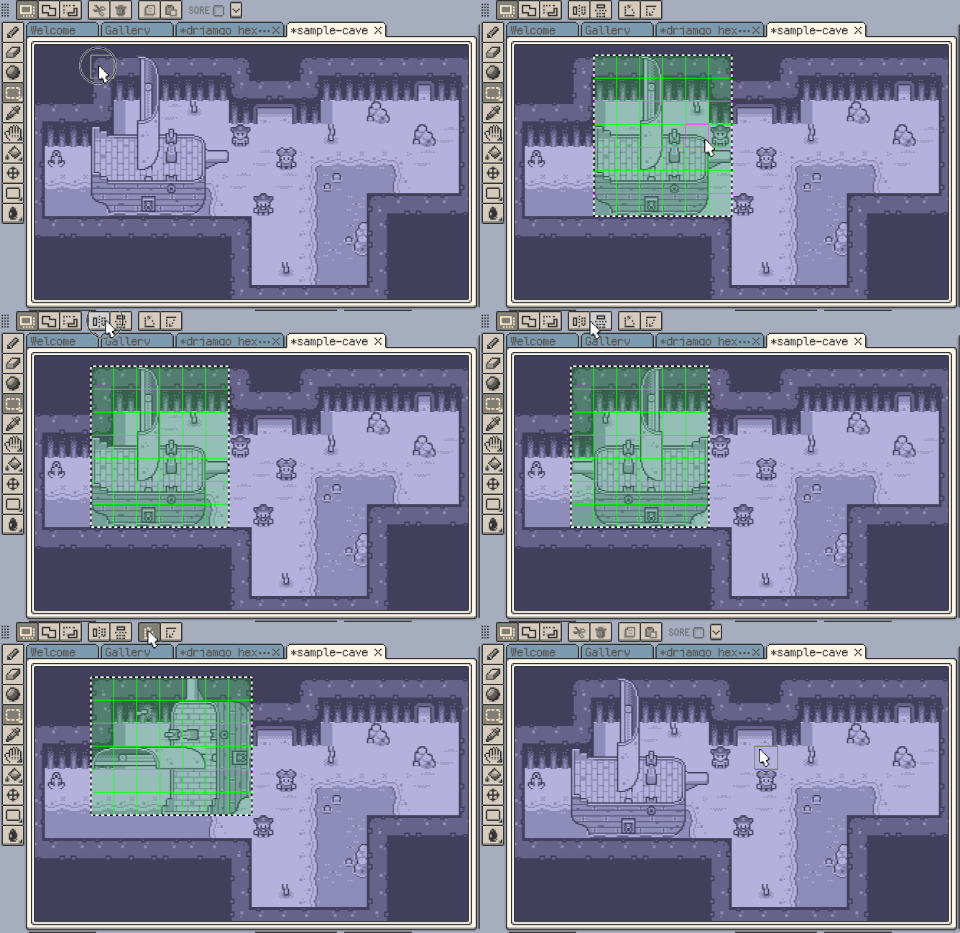
Use Terrain Rules
Terrain rules are useful for water edges, grass borders, roads, wall connections, and other tiles that need matching edges. After rules are set up, you can paint a rough area and Resprite will choose suitable edge, corner, and connection tiles based on nearby cells.
Basic flow:
- Select the target tileset in the Tilesets panel.
- Choose Tileset ▸ Edit Terrain Rules. You can also choose Edit in the Terrains section of the Tilesets panel.
- Create a terrain set and choose Corner, Edge, or Mixed mode.
- Create a terrain and set its name, color, and optional representative tile.
- Mark the matching rule positions on tiles in the tileset.
- Return to the Terrain tab in the Tilesets panel, select the terrain, and paint on a tilemap layer.
For detailed setup and painting instructions, see Terrain Rules and Terrain Painting.
Terrain rules support rectangular and isometric tilemap layers. Hexagonal tilemap layers do not support terrain rules.
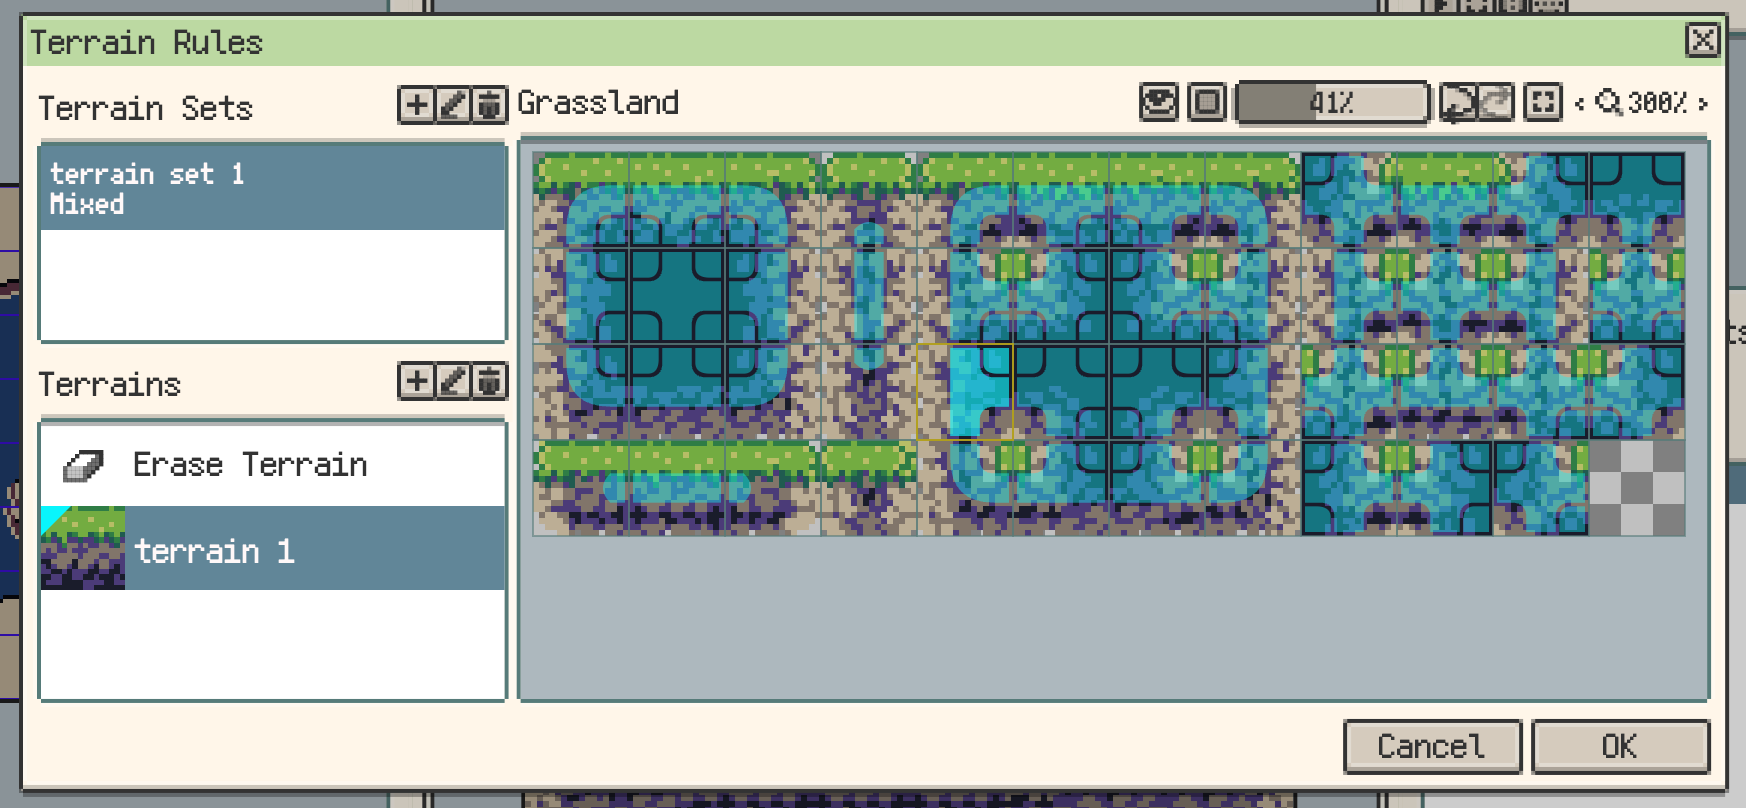
After defining how tiles connect in the Terrain Rules window, return to the Tilesets panel and choose the terrain. You can then paint broad areas like a normal brush, while Resprite picks the right edge, corner, and connection tiles.
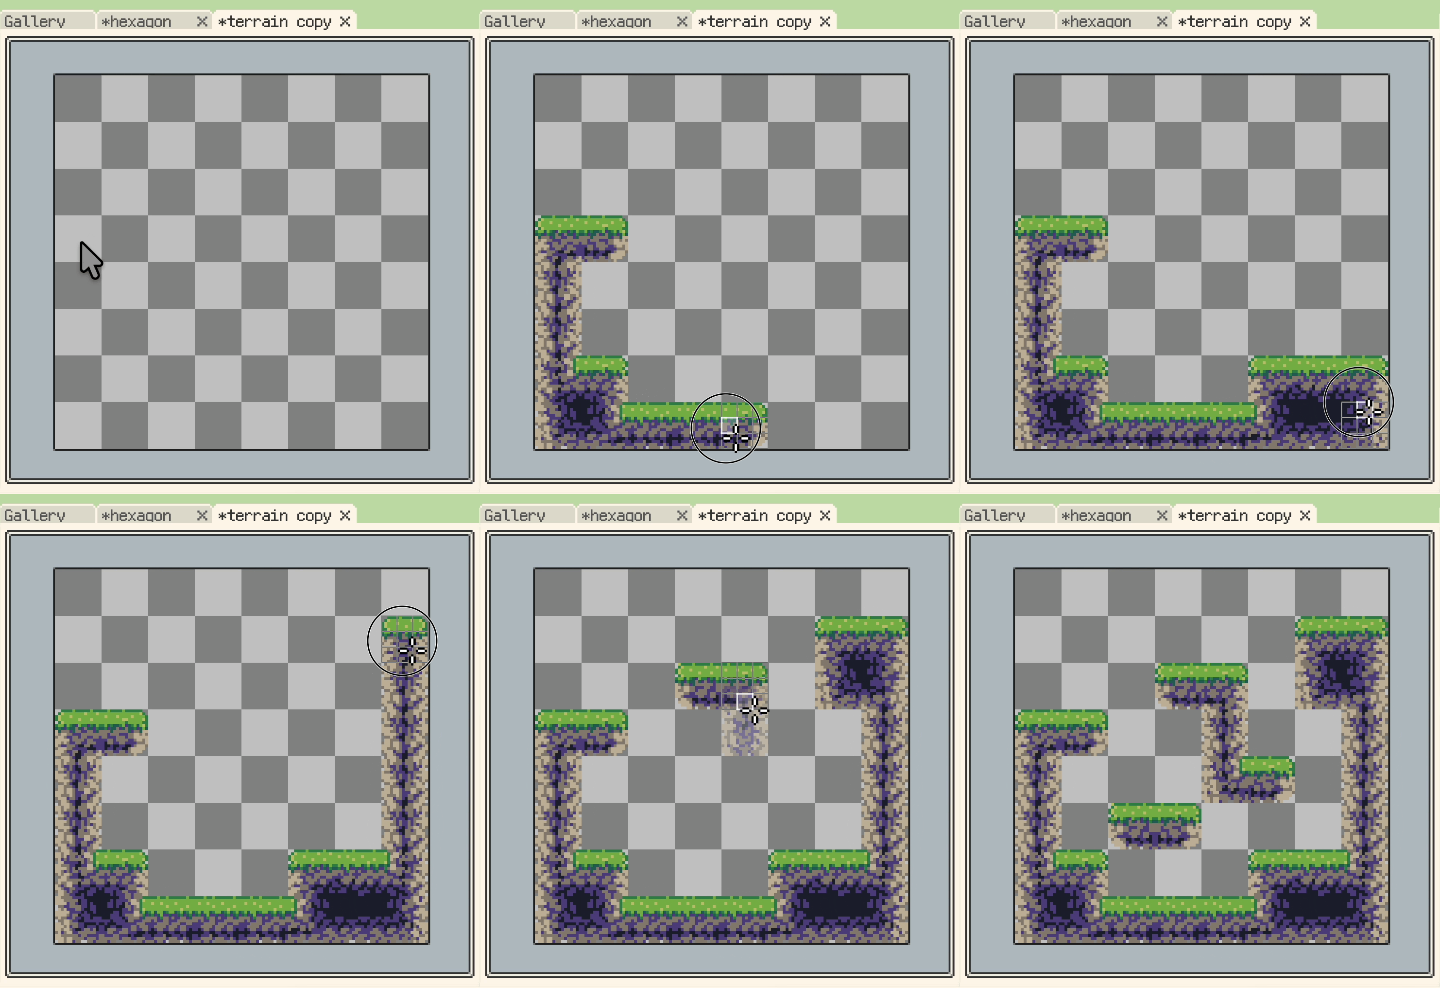
The Grassland tileset shown in the terrain-rules examples above is adapted from Shackhal's Multi Platformer Tileset, released under Creative Commons CC0 1.0 Universal. For these examples, the upper section of the tileset was modified into road tiles.
Edit Tilesets
The Tilesets panel is not only for choosing the current tile. It also lets you maintain tilesets in the current document.
Common actions include:
- Tileset Properties: edit the tileset name, tile size, base size, and related settings.
- Tile Properties: adjust the visible area, offset, probability, and animation for a single tile.
- Copy / Cut / Paste / Delete Tiles: copy, move, or remove tiles inside a tileset.
- Move Tiles to Tileset: move selected tiles into another compatible tileset.
- Rearrange Tileset: change column count and tile order.
- Merge into Another Tileset: merge one tileset into another.
- Save to Tileset Library: save a tileset to the local tileset library for reuse.
If a tile is already used in the map, Resprite may ask for confirmation before deleting, moving, or merging it. Check whether the map still needs those tiles before confirming.
Linked Tileset Workflow
Linked tilesets are useful when you want to edit tile artwork in the same document and immediately check how it looks in the map.
Create a New Tileset from a Layer
If you are still drawing a new set of tiles, place them on a normal layer or layer group first, then create a linked tileset from that layer.
- Prepare a normal layer or layer group for the tile artwork.
- Select that layer or layer group.
- Use Tileset ▸ Add Tileset ▸ Link Current Layer, or open the timeline layer menu and choose Link as Tileset, to create a linked tileset.
- Create a tilemap layer and paint with that tileset.
- After editing the source layer, use Refresh from Linked Layer, or enable Auto Refresh Linked Tileset.
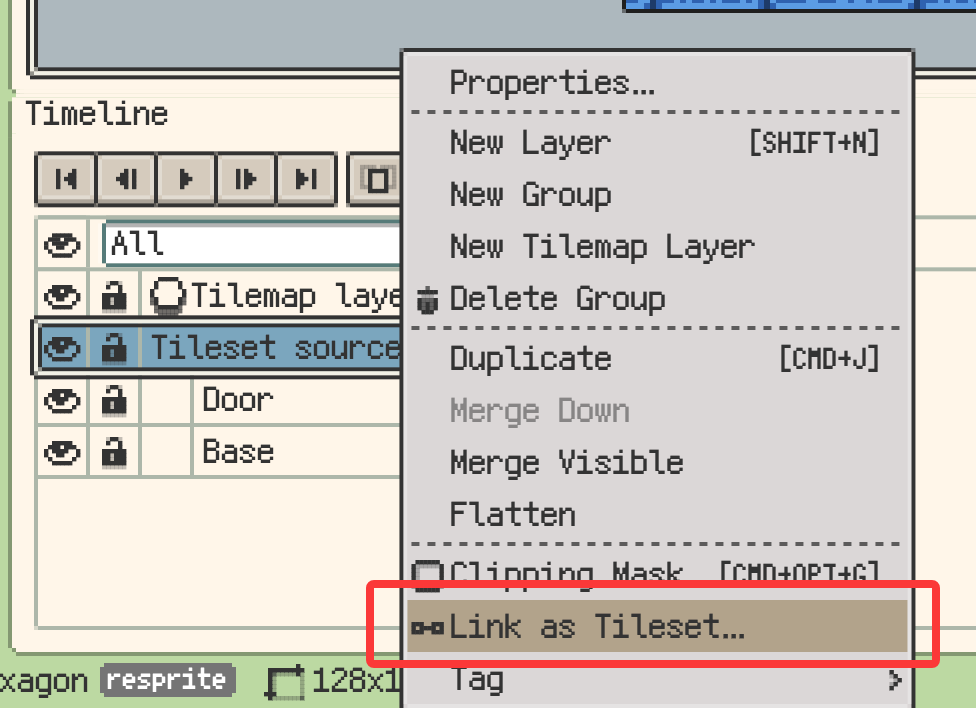
Edit an Existing Tileset Image
If the tileset already exists, you can also create a linked layer for it:
- Select the target tileset in the Tilesets panel.
- Use Create Linked Layer, then choose Link as Layer or Link as Group. The command is available from the Tilesets panel toolbar and the selected tileset menu.
- Edit the tile image in the newly created normal layer or layer group.
- Use Refresh from Linked Layer to update the tileset.
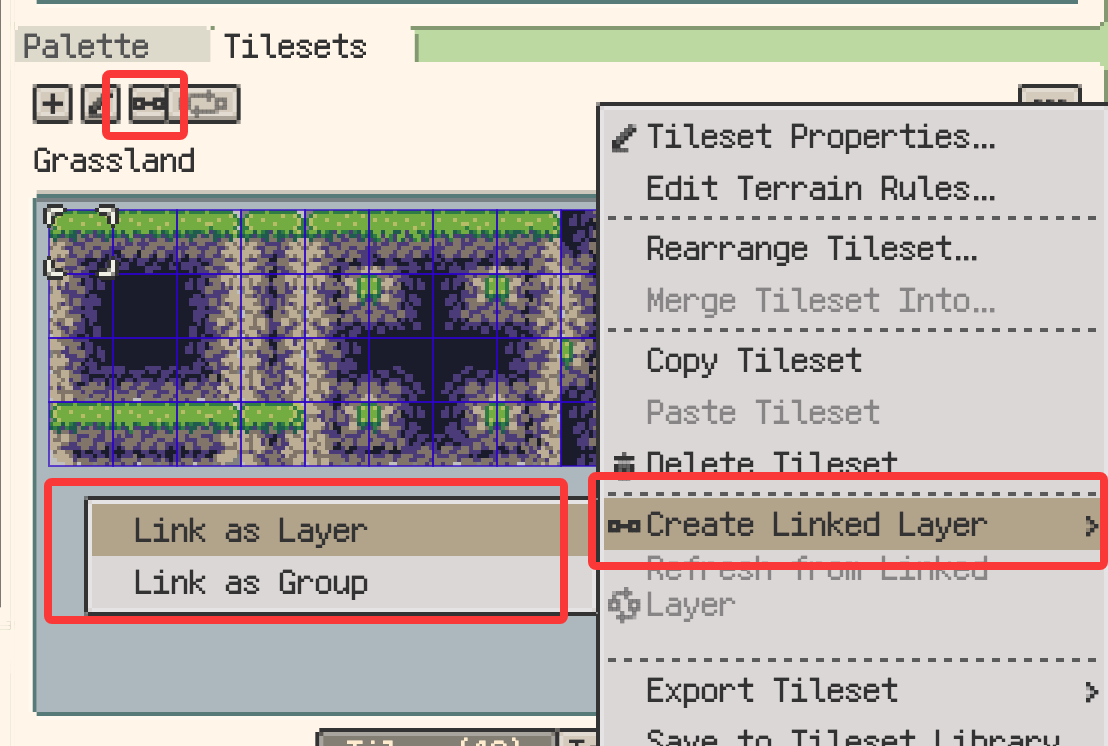
This workflow works well while the artwork is still changing. You can lay out the map first, then return to the linked layer to refine the tile designs.
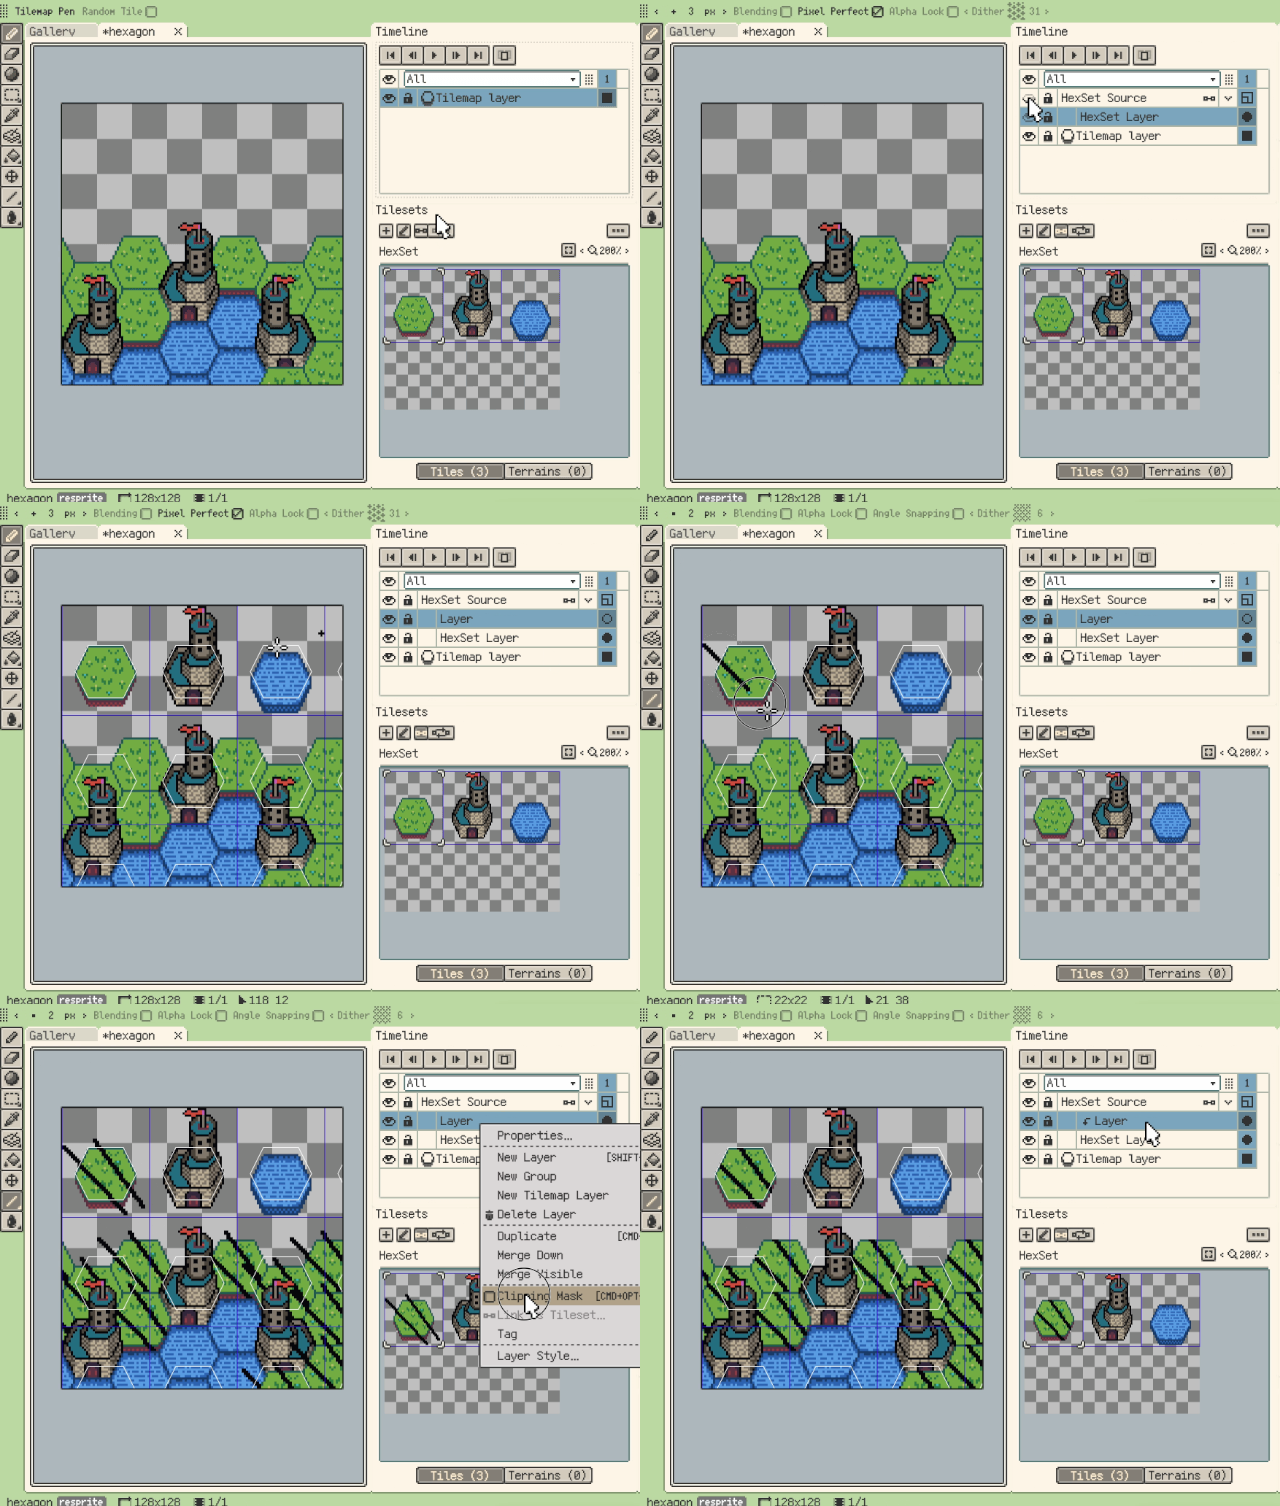
Use Linked Tileset Guides
After selecting the source layer of a linked tileset, enable View ▸ Linked Tileset Guides. Resprite displays the slice boundaries and base outlines of the tileset source image on the canvas, helping you align each tile precisely.
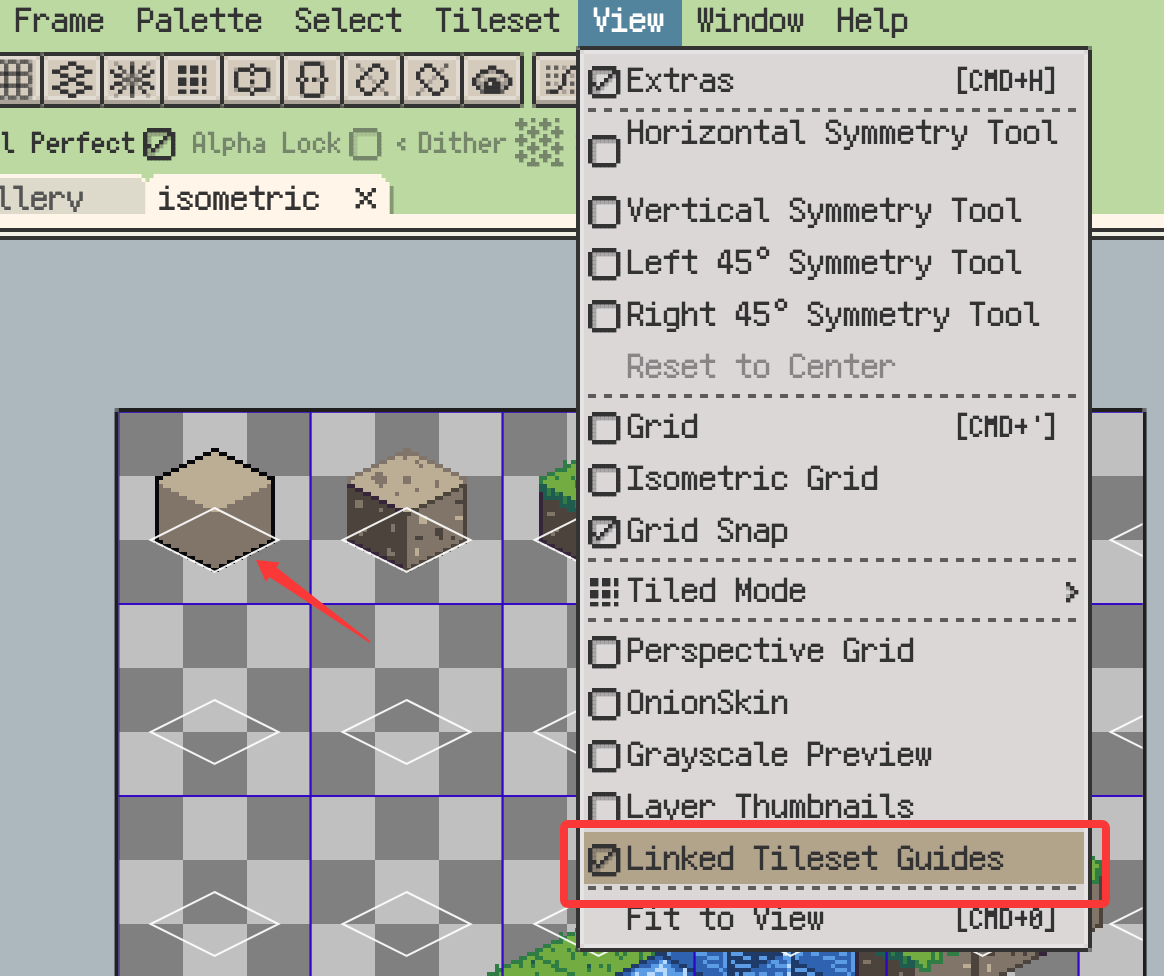
With a selection tool active and Double-Click Select Grid Cell enabled, you can also double-click a slice cell to quickly select the corresponding tile image area.
These guides are especially useful when editing isometric tiles or drawing walls, trees, and other objects that extend beyond the tile base.
Build Complex Tilesets with a Linked Group
For a more complex tileset, choose Link as Group. Resprite composites the visible raster layers in the group into the tileset image.
You can keep base colors, outlines, shadows, textures, and decorations on separate layers. Each layer can have its own order, visibility, opacity, and blend mode. This lets you change one part of the artwork without flattening the source layers.
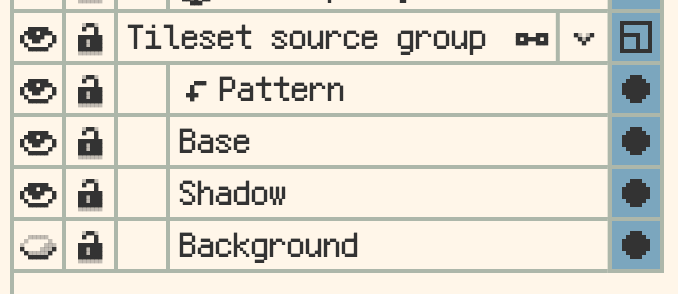
After you refresh the linked tileset or enable auto-refresh, the changes are applied to the tileset and appear wherever those tiles are used on the map. Compared with linking a single layer, a linked group is better suited to complex tilesets that need ongoing refinement while preserving their layered source.
A linked group must contain at least one raster layer and cannot contain tilemap layers. The tileset uses only the first frame of its source layers.
Tile Animation
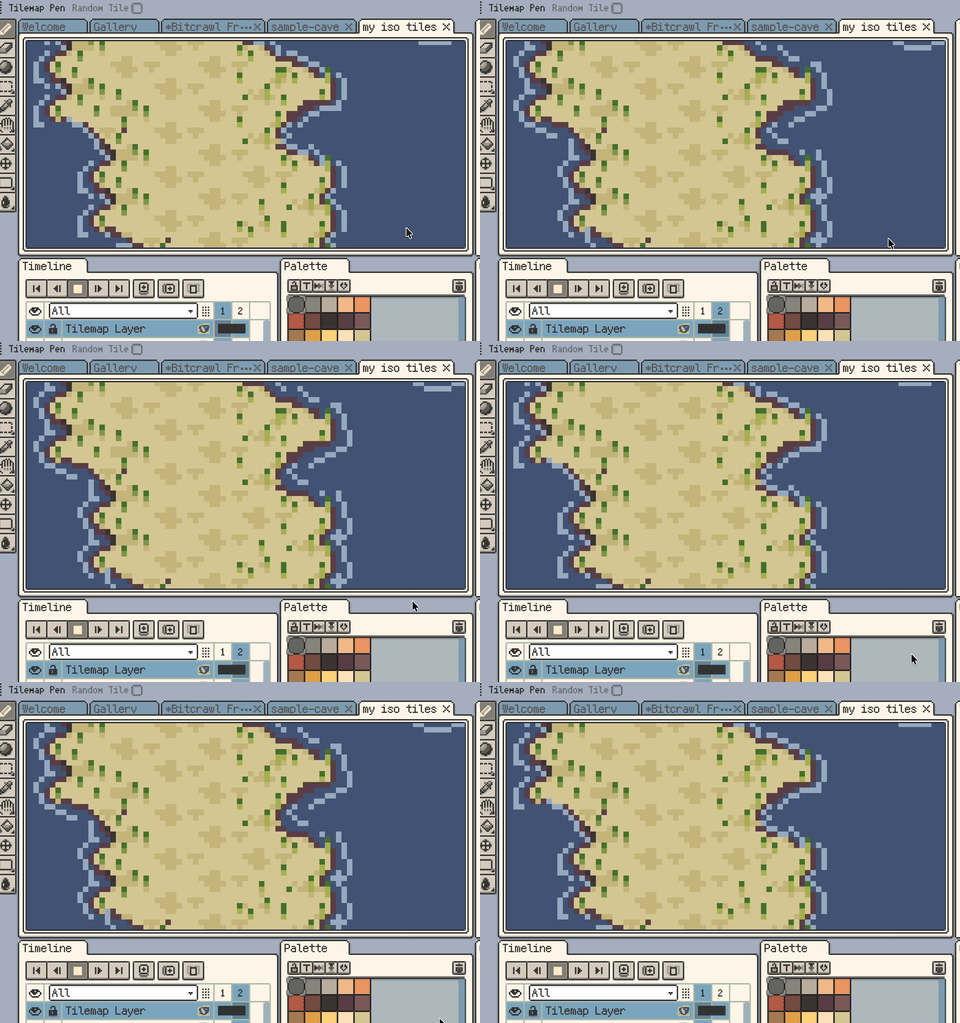
Tile animation is useful for water, fire, mechanisms, blinking lights, and other animated elements that repeat across a map.
Set animation frames on a tile in Tile Properties. Every map cell that uses that tile will display the animation, so you do not need to animate each cell separately.
Combine with Normal Layers
Tilemap layers can be used alongside normal layers and layer groups. Common combinations include:
- using lower tilemap layers for ground;
- drawing characters, props, or special occlusion on normal layers above;
- separating ground, walls, decorations, and interaction references into multiple tilemap layers;
- rendering tilemap layers together with other layers when exporting a normal image.
For complex occlusion, use multiple layers instead of placing everything on a single tilemap layer.
Save and Version Compatibility
.resprite files that contain tilemap layers require DA 1.32.0, iOS R59, or later. Older Resprite versions cannot fully read tilemap content.
If you need to hand off a map to Tiled or a game development toolchain, continue with Tiled Map Compatibility.
Tips for Larger Projects
As a map grows, separate ground, walls, decorations, occlusion, and interaction references into multiple tilemap layers. This makes each type of content easier to edit and gives you better control when exporting images or Tiled maps.
If the project will be used in Tiled or a game development toolchain, keep tilemap layers that need to be exported together on the same grid type and tile size whenever possible. The exported map structure will be easier to read and integrate.