Set Up the Toolbar and Your Core Tools
Resprite's drawing workflow is built around two parts: the toolbar itself, and the options shown for the currently selected tool. The layout is not identical across platforms, so it helps to place the toolbar where it feels natural before diving into the tools themselves.
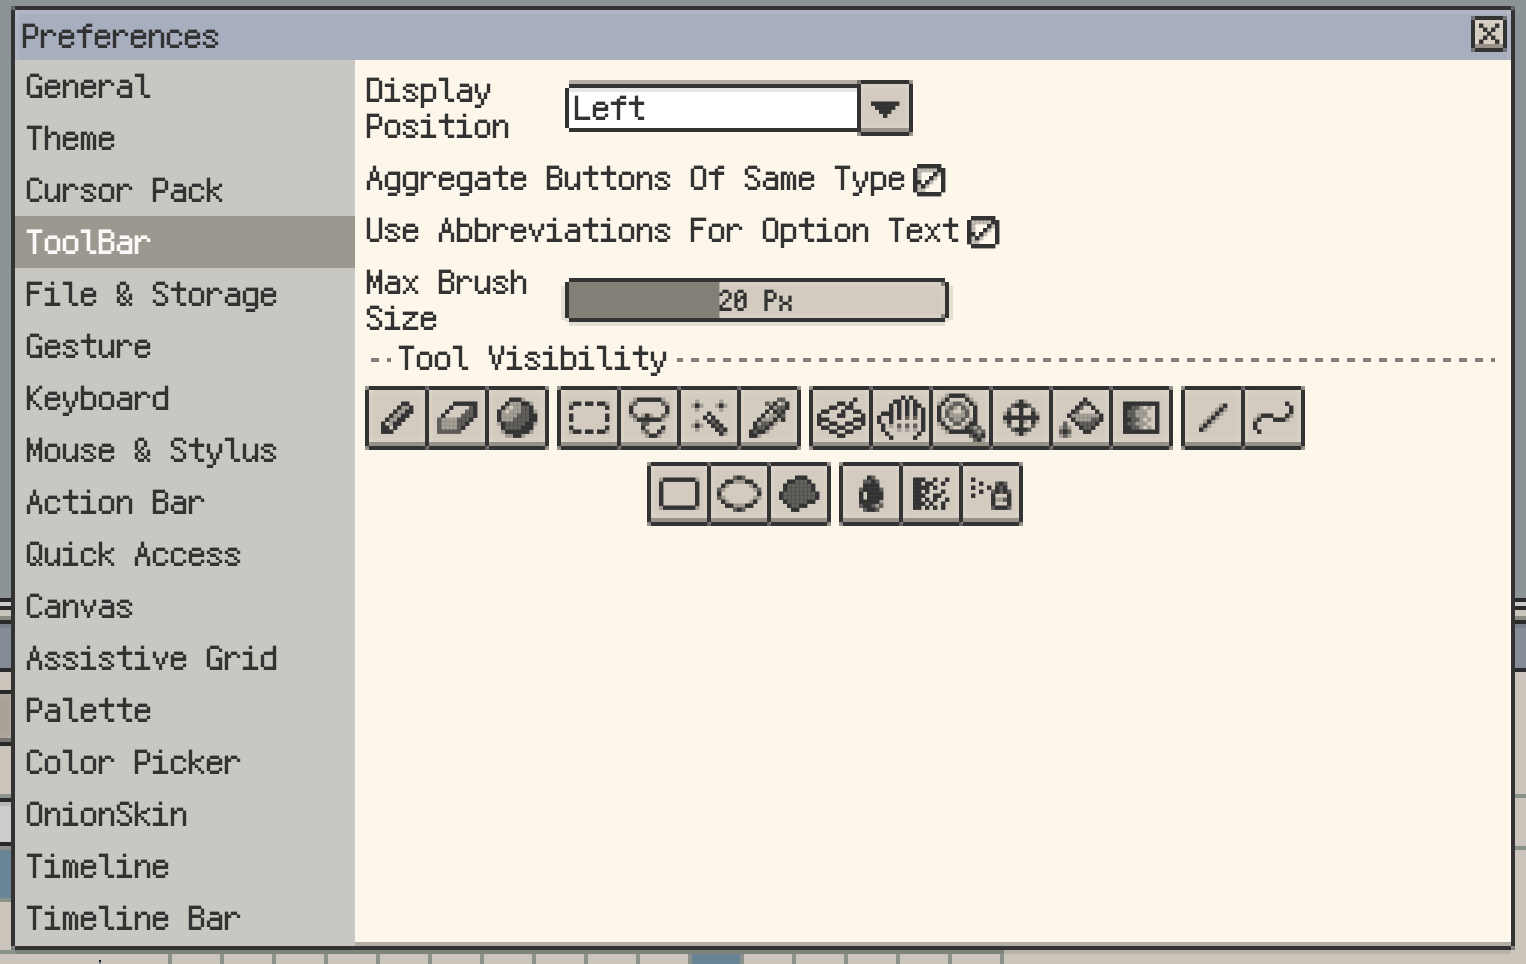
Toolbar and display options
iOS
- In Preferences ▸ Toolbar, you can choose whether tools and tool options should appear at the top.
- When there is enough space, both the tool list and the current tool options can be moved to the top bar.
- You can also hide tools you rarely use to keep the toolbar compact.

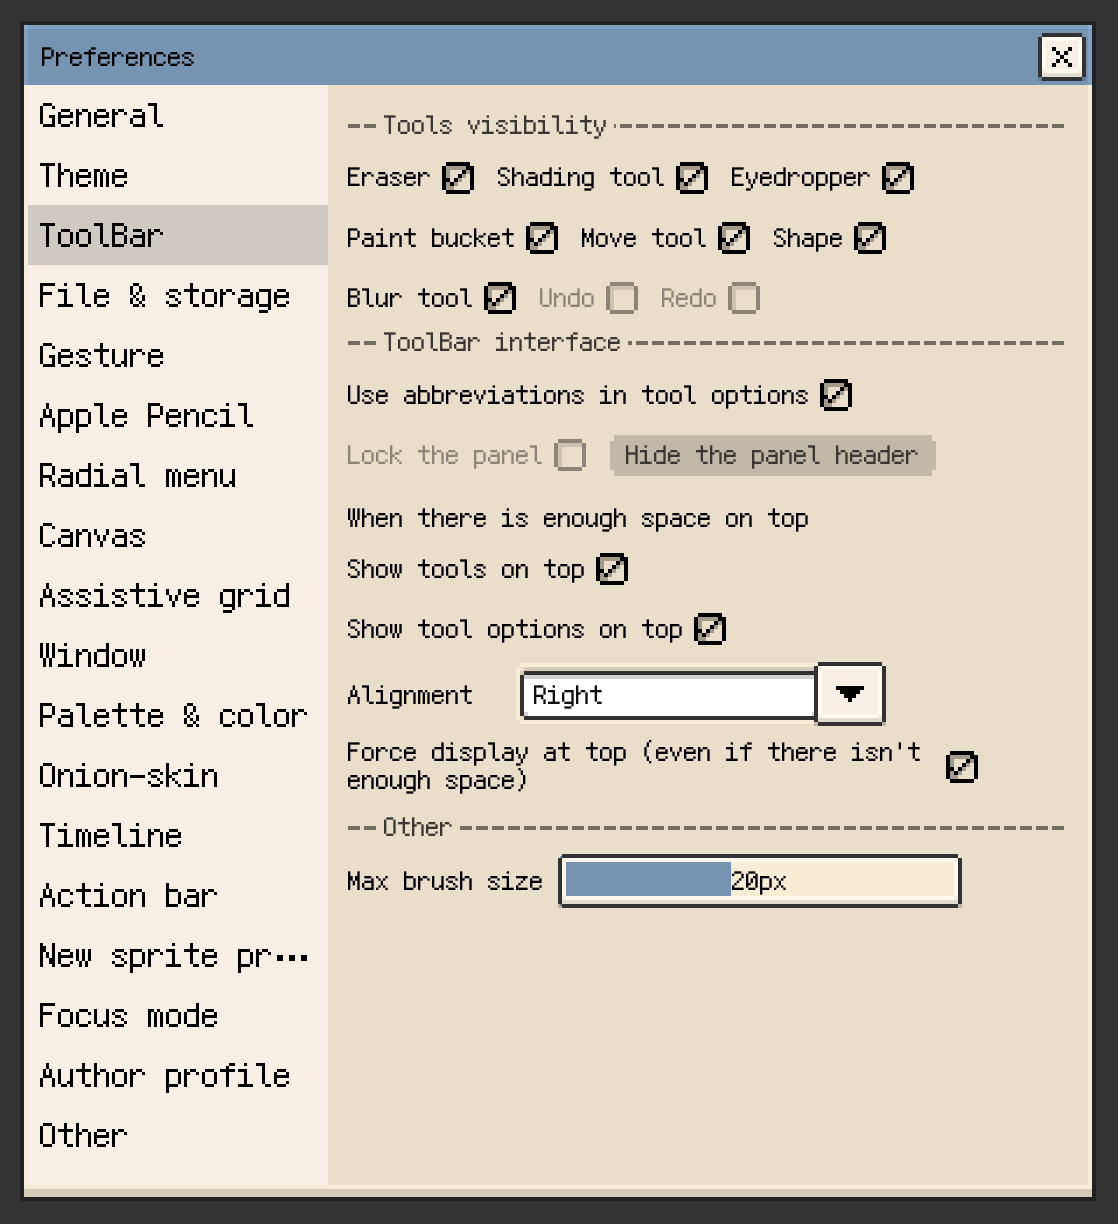
Desktop and Android
- In Preferences ▸ Toolbar, the main toolbar can be placed on the left, right, or top.
- The options for the active tool are shown in the top tool option bar and update as you switch tools.
- You can enable Aggregate Buttons to collapse selection, fill, shape, filter, and helper tools into shorter grouped entries.
- You can also hide tools you do not use often. Both iOS and desktop support hidden tools, but the configurable range is not exactly the same.
Action bar shortcuts
The action bar also exposes a few quick actions, such as export or resetting the symmetry center. It is useful for speed, but it does not replace the full toolbar.
Core drawing tools
Pencil
The pencil is the main drawing tool and covers most pixel-art workflows on its own.
Key options:
- Brush shape: switch between square and round tips.
- Brush size: drag the brush size control horizontally or vertically to resize the brush.
- Double-click / double-tap on the size control: on iOS, this toggles between
1 pxand your previous size; on desktop, it resets directly to1 px. - Blending: blends semi-transparent strokes with existing pixels underneath.
- Pixel Perfect: helps avoid unwanted diagonal corner artifacts at line joints.
- Alpha Lock: limits painting to pixels that already exist.
- Dithering: lets you paint with a pattern instead of a flat color.
See Dithering for pattern-specific workflows.
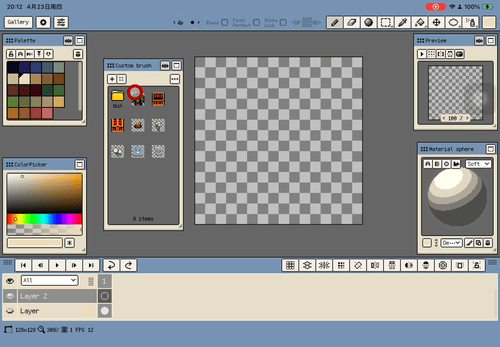
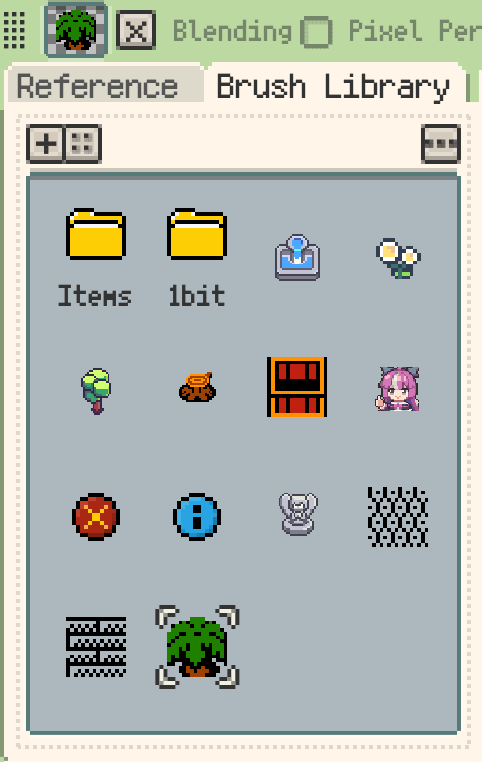
Custom Brush
On desktop and Android v1.31.0+, and on iOS R56+, Custom Brush lets you turn a selection or imported image into a reusable brush.
- Create a brush from the current selection when you want to reuse a small motif, texture, or stamp.
- Import images or drag image folders into the Brush Library to build a reusable brush set.
- The active brush can draw with the current pen color, and supports tiling plus global or stroke-start alignment.
On iOS R56+, Custom Brush is shown as a dedicated floating window. It can be saved as part of workspace layouts and is used for brush selection, folder organisation, source import, and tiling options.
Eraser
The eraser shares most of the pencil's options, including brush shape, brush size, dithering, Alpha Lock, and Pixel Perfect. It is especially useful for cutting texture or transparency back into existing shapes.
Hold Shift to continue a straight segment from the previous stroke endpoint.
Shading
The shading tool walks through neighbouring colors in the palette, making it fast to build directional light and shadow.
- Direction: switch between horizontal and vertical directions, or drag to choose from all four directions.
- Color range: uses the current swatch plus neighbouring colors in palette order.
- Full Palette: shades across the whole palette instead of staying near the current swatch.
- Dithering: applies a pattern while shading.
- Shift straight lines: hold Shift to continue a straight segment from the previous stroke endpoint.
If you switch shading direction often, pair this tool with a shortcut, or enable the relevant stylus double-tap behaviour on supported devices.
Selection tools
Resprite includes rectangle, ellipse, lasso, and magic wand selections on every platform, together with Replace, Add, and Subtract modes.
- In Replace mode, clicking outside the selection clears it.
- When another tool is active, you can still dismiss the selection from that tool's option bar.
- The status bar shows the width and height of the current selection, which is useful for precise editing.
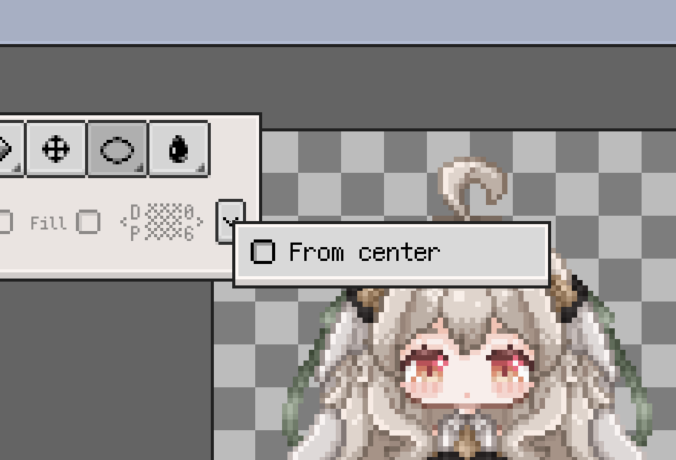
- On iOS R55+, ellipse selection matches rectangle selection with the same Replace / Add / Subtract flow, plus perfect-circle constraint and draw-from-center support.
- On desktop / Android, rectangle and ellipse selections both support drawing from the center. Holding Shift locks to a square or circle when starting a new selection, or temporarily switches to Add when a selection already exists.


Desktop workflow shortcuts:
- Hold Ctrl and drag to duplicate the current selection.
- Hold Shift while using a selection tool to temporarily switch to Add mode.
- If a grid is enabled,
Shift + Arrow keysmoves the selection by grid units.
For free transforms, distortion, or scaling, continue to Transform.
Eyedropper
The eyedropper samples colors from the canvas. Common options include:
- All Layers: sample from the composite of all visible layers instead of only the current layer.
- Auto Back: return to the previous drawing tool after sampling.
- Palette Sync: if the sampled color already exists in the palette, select that swatch as well.
You can also long-press the canvas to temporarily invoke color picking without switching tools.
On iOS R55+, and on desktop and Android v1.31.1+, color picking can show an eyedropper loupe while sampling from either the canvas or reference images. The loupe combines magnified pixels, a crosshair, and a new/previous colour ring so precise picks are easier to confirm before you release. On desktop and Android, the loupe is shown by default and can be disabled in Settings.
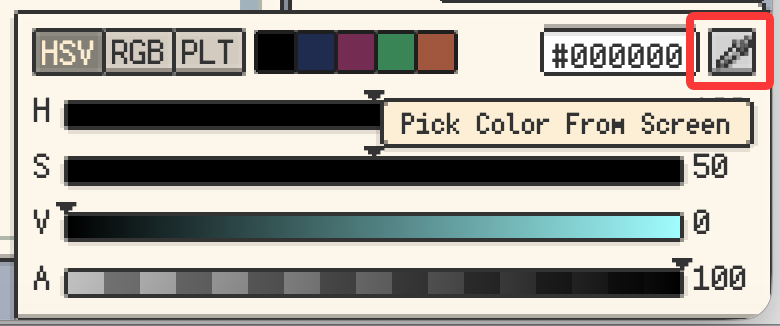
On desktop, macOS and Windows builds also support Screen Pick through the color detail panel, letting you sample colors from anywhere on the display, including other apps and reference material.
Bucket Fill
The fill tool can fill with the active color, a palette color, or a dithering pattern.
- Continuous: limits the fill to connected pixels.
- Tolerance: includes nearby colors within the threshold.
- Ignore Color: treats the target color as transparent during the fill.
- Pattern: applies dithering while filling.
- Tiled Mode: fills using tile-aware behaviour and prioritises the active selection when enabled.
Disable Continuous if you want to replace the target color across the entire layer.
Shape and effect tools
Move Tool
The move tool shifts content inside the current cel, or across multiple frames and layers.
- All Frames: applies the move to every frame in the timeline.
- All Layers: applies the move to every layer. If the current layer is a group, its children move with it.
Gradient Tool
The gradient tool creates linear or radial gradients, with optional dithered steps for pixel-art-friendly transitions.

- Connected Only: matches the fill tool's continuous-area logic.
- Tolerance: expands the gradient to include similar colors.
- Gradient Type: switch between linear and radial.
- Start / End Colors: set the two endpoint colors and swap them directly.
- Dither Mode: supports
2×2,4×4, and8×8dither steps; when disabled, the tool outputs an RGB gradient.
Shape Tools
Shape tools include line, curve, rectangle, ellipse, and contour variants.
Shared options:
- Brush Shape & Size: controls outline thickness.
- Fill: fills closed shapes such as rectangles and ellipses.
- Dither Mode: adds pattern fills or patterned outlines.
- Draw from Center: draws rectangles and circles outward from the center.
- Angle Snapping: hold Shift to constrain straight lines to fixed angles.
- ISO Snap: provides angle presets designed for isometric pixel art, including newer stair-step variants.
Blur, Spray, and Jumble
- Blur: replaces pixels under the brush with the average of the surrounding
3 × 3neighbourhood. Alpha Lock helps stop blur from spilling into transparency. - Spray: scatters pixels inside the brush radius, which is useful for soft texture, grain, and airbrush-like effects.
- Jumble: randomly shifts pixels under the brush, making it useful for breaking up repeated textures or roughening edges.
All three are useful for texturing and local effects, and all three support drawing straight segments from the previous stroke endpoint.

Desktop / Android helper tools DA version only
Desktop and Android builds also include a small group of helper tools focused on navigation and layer targeting:
- Select Layer Tool: click content on the canvas to jump to the corresponding layer in the timeline.
- Hand Tool: drag the canvas directly. On desktop, many people also use the space bar for temporary panning.
- Zoom Tool: gives you a more direct way to control canvas zoom, which is especially useful in pen-tablet and mouse workflows.
iOS does not expose separate toolbar icons for Hand, Zoom, or Select Layer, although parts of that behaviour can still be reached through gestures and input settings.
