Import Artwork
Import existing projects, images, or animation frames to continue editing in Resprite. Imported Aseprite, PSD, and Tiled maps become .resprite projects; saving the project does not update the source file. To return edited work to another app, export a copy.
Open the Import Panel
Choose Import in the Gallery and select the file type. On desktop, you can also use File ▸ Open or the editor's File ▸ Import menu. Desktop file pickers open directly; mobile image imports offer sources such as Files, Photos, or the clipboard.
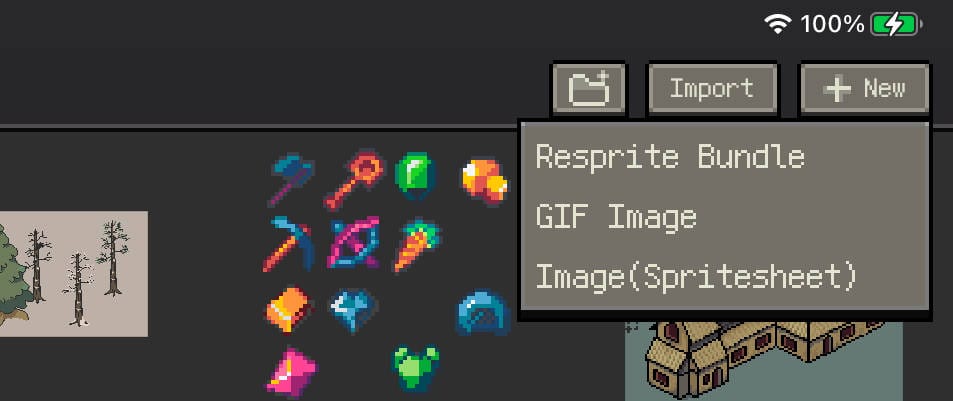
Gallery imports are added to the Gallery. When importing into a new desktop document, save it as .resprite to retain editable layers and animation. Desktop also supports direct image editing and saving for common bitmap formats.
Resprite Bundle (.resprite)
Choose a .resprite file to bring in an editable project with its layers, frames, palette, and project settings. On iPhone and iPad, you can select it from Files or open a received project in Resprite.
Reference images travel with the project. Timelapse recording data is stored separately and is not included in the project file.
Images and existing artwork
Use image import for PNG or JPEG artwork. Leave Split Sprite Sheet off to bring in the whole image. To place an image in a project that is already open, use Insert Image, or add it as a reference image for viewing and colour picking.
GIF / APNG Image
Choose GIF or APNG import to bring animation frames and their recorded timing into the timeline. Check the imported frames and playback before editing. Desktop and Android also support importing still or animated WebP.

Sprite Sheet Image
Enable Split Sprite Sheet in image import, then set the starting X / Y position and each frame's width and height. Check the grid preview and choose whether to ignore partial tiles or empty frames.
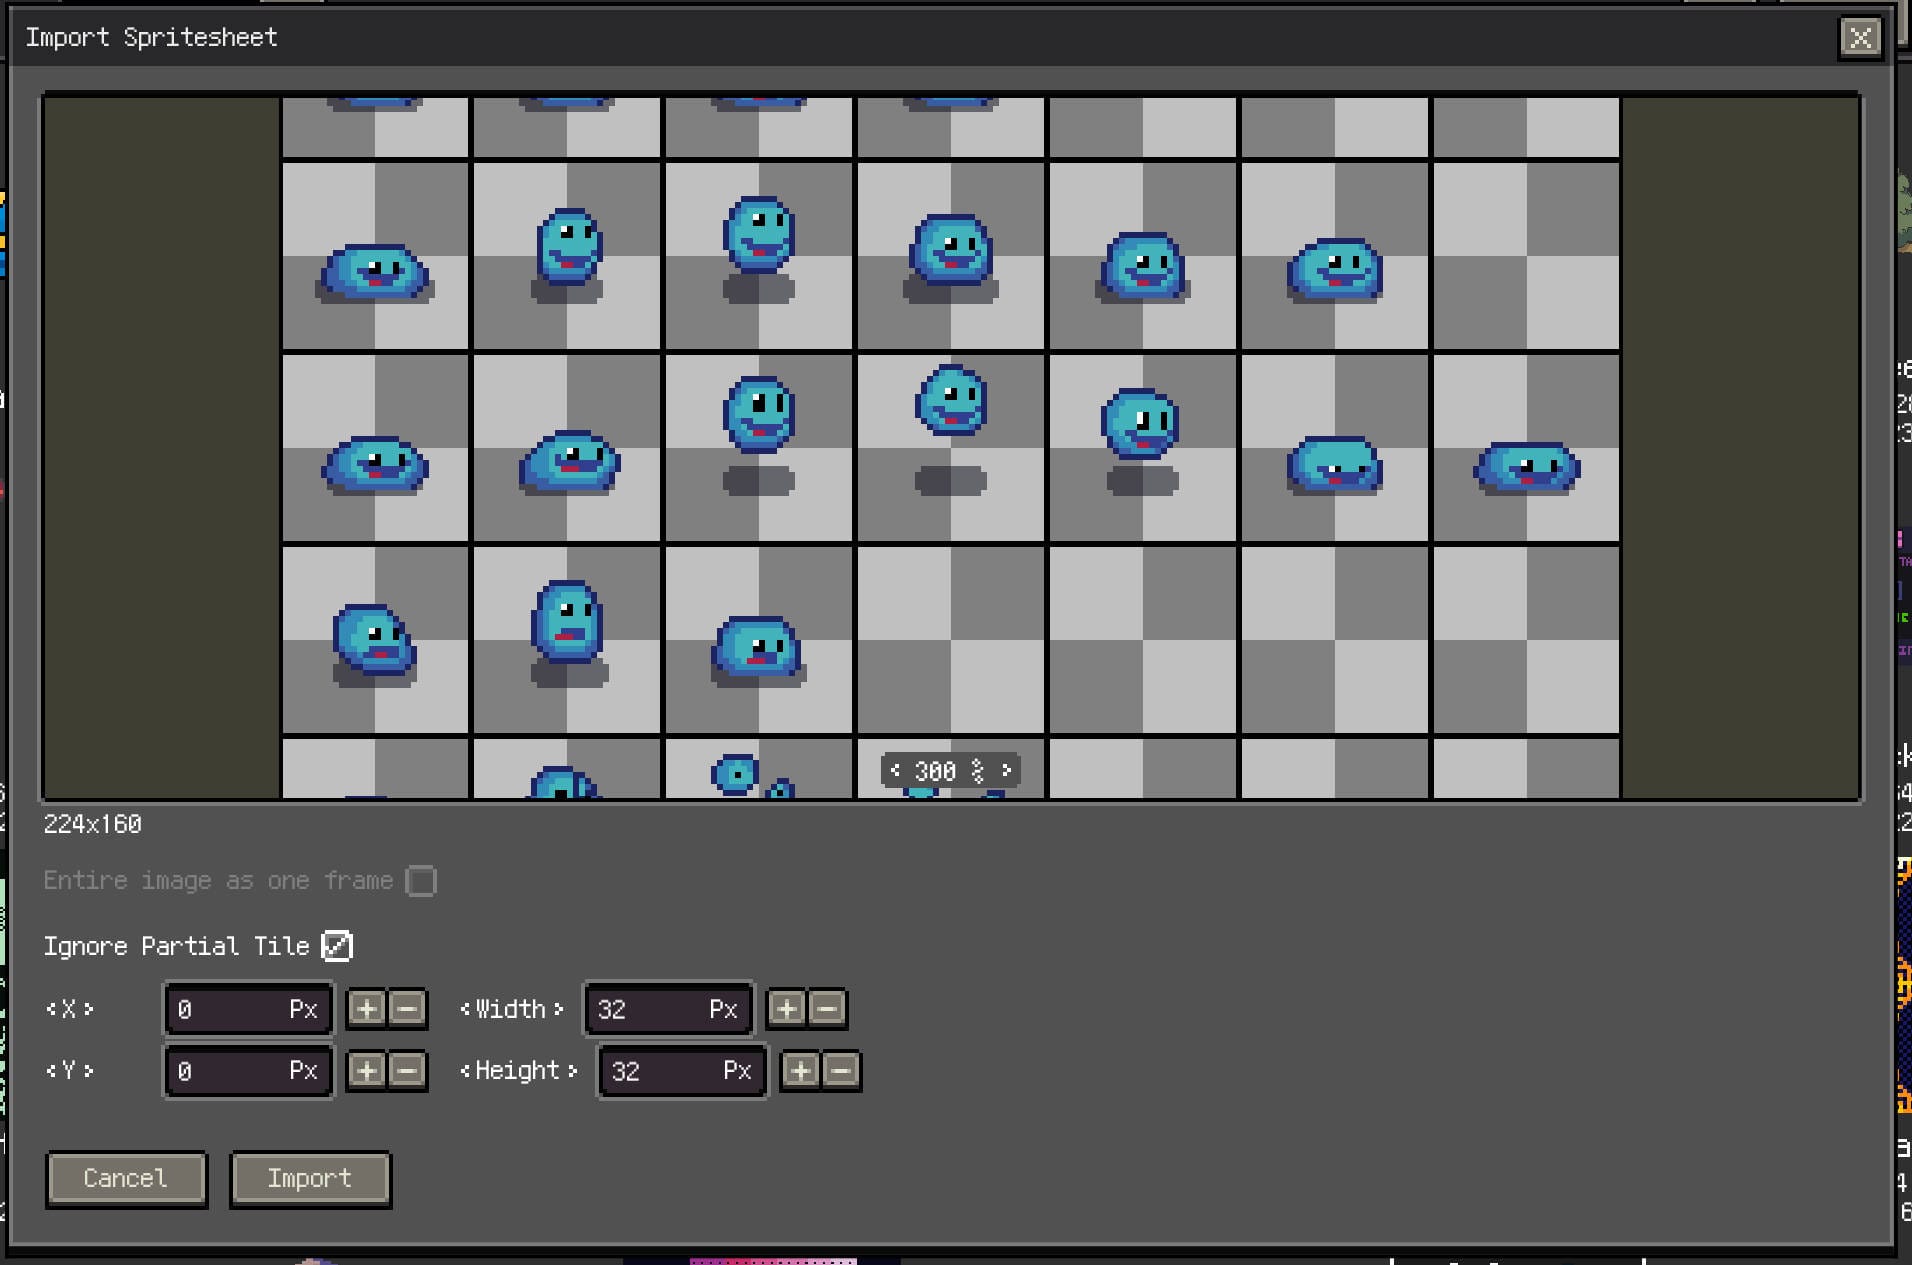
You can select several images in one import session. Each image becomes a separate layer, with its slices arranged as frames. Use this when animation elements are supplied as matching sheets.
Tiled Maps and Tilesets
For a full map, import .tmx on desktop or a Tiled map .zip containing the map, .tsx files, and images. ZIP packages are the preferred mobile workflow because the related resources can be read together.
To reuse a tileset without importing a map, add .tsx or .restile to the document or tileset library. On mobile, package a Tiled tileset with its images in a ZIP. These are resource imports, rather than whole-project imports. See Tiled Map Compatibility for the supported workflows and conversion limits.
Aseprite (.aseprite, .ase)
Choose the Aseprite import entry to convert supported layers, animation frames, and tags into a Resprite project. Group appearance, linking, and other properties can change; review Aseprite compatibility when editable structure matters.
Photoshop PSD (.psd)
Choose PSD import to convert supported layered content into a project. Check the layers and appearance after import. See PSD Import and Export for the supported content and handoff workflow.
Palette files have a separate palette import workflow.