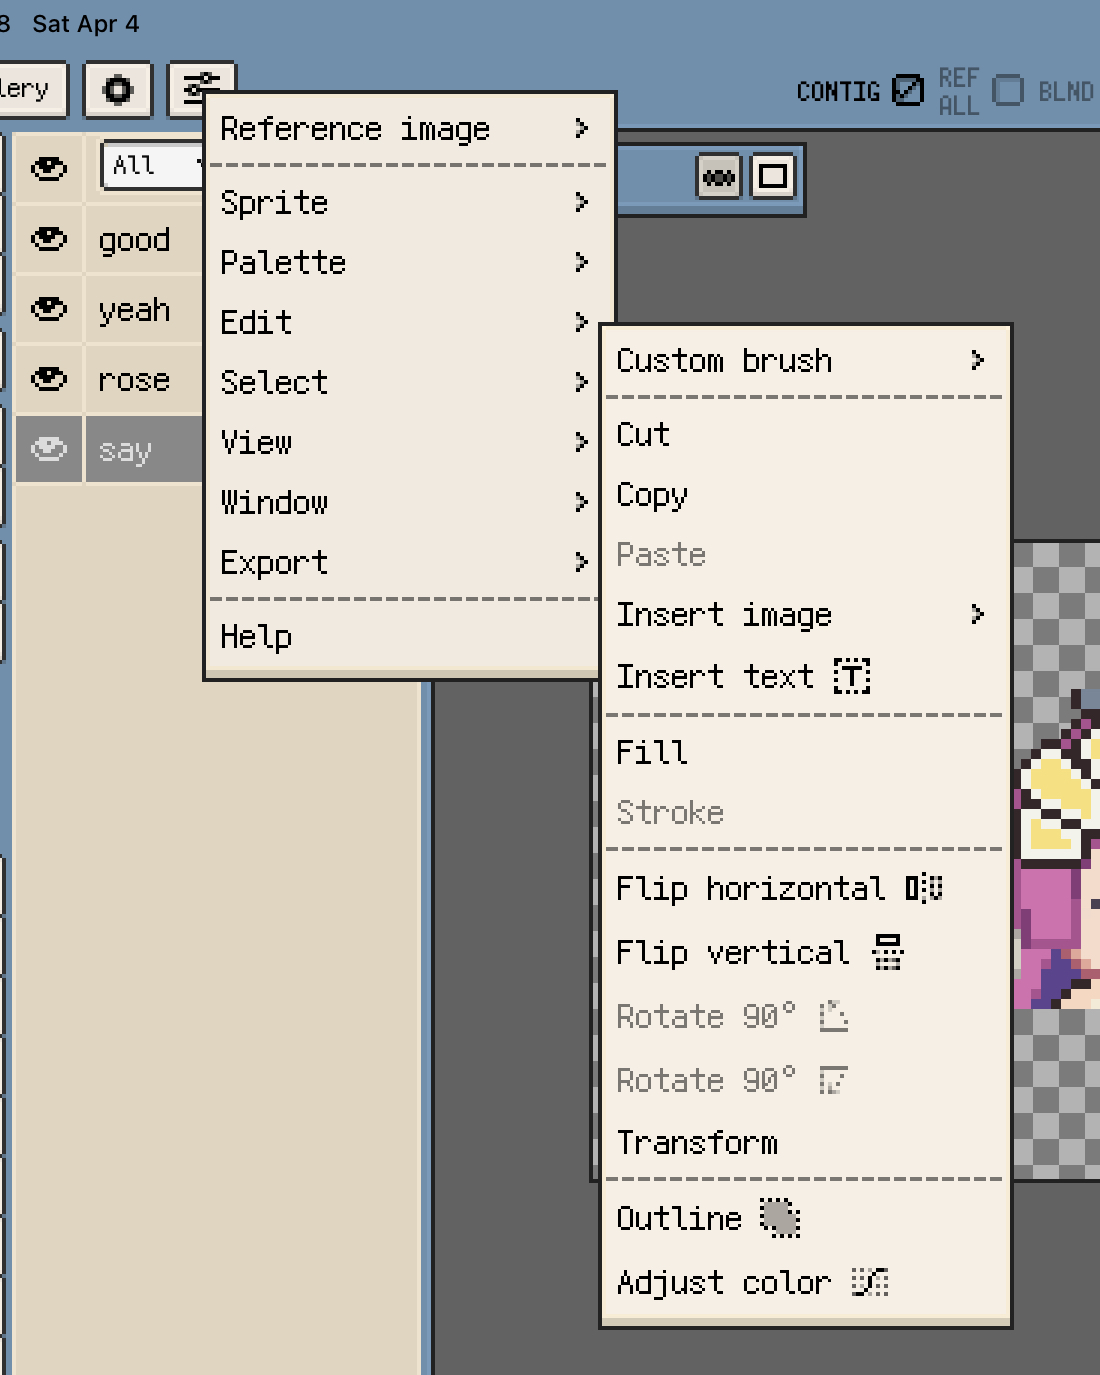
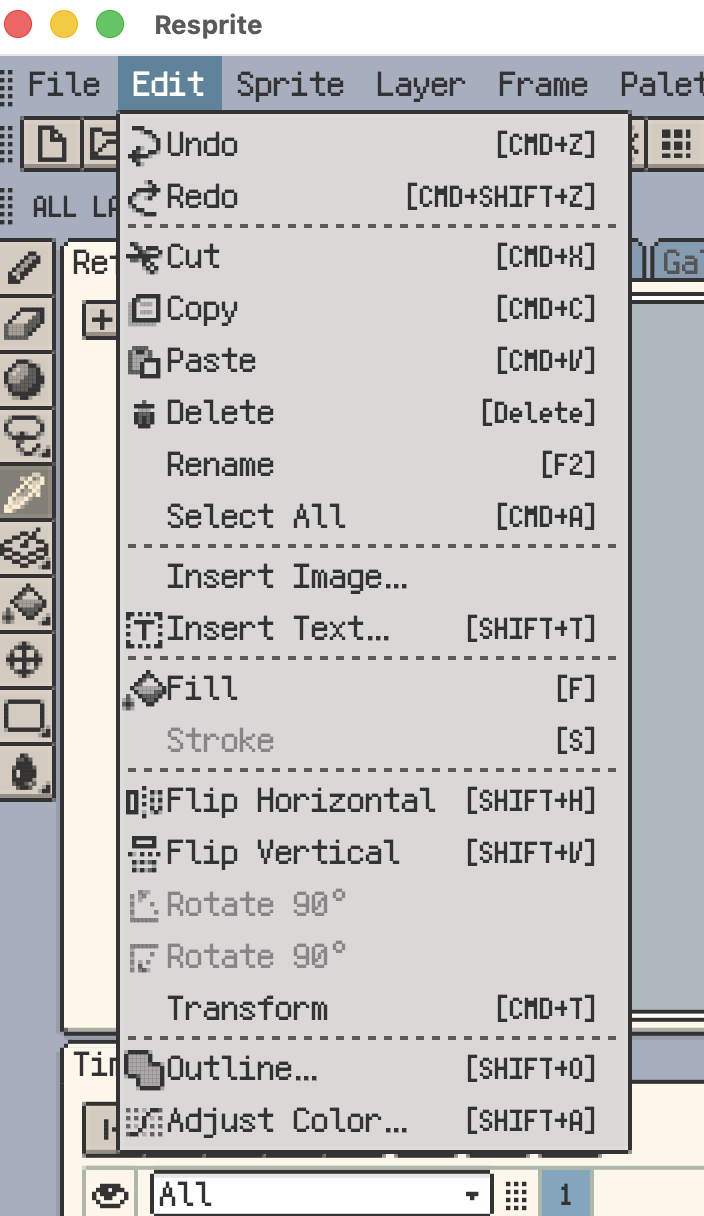
Editing
The Edit menu is mainly for working on pixel content in the current selection or active cell, plus broader dialogs such as Outline and Adjust Color. If you need sprite-wide resizing, cropping, flipping, or rotation, continue with Sprite.
On desktop, the top of the Edit menu also includes general commands such as Undo, Redo, Delete, Rename, and Select All. The pixel-editing commands start lower in the menu.
The two screenshots below show the current Edit menu on iOS and desktop.
Cut, Copy, and Paste
Cut, copy, and paste are available from Menu ▸ Edit, and also from parts of the selection workflow.
- With an active selection: these commands work on the selected pixels first.
- Without a selection: they continue from the current cell content.
- Across documents: in common workflows, copied pixel content can be pasted into another project.
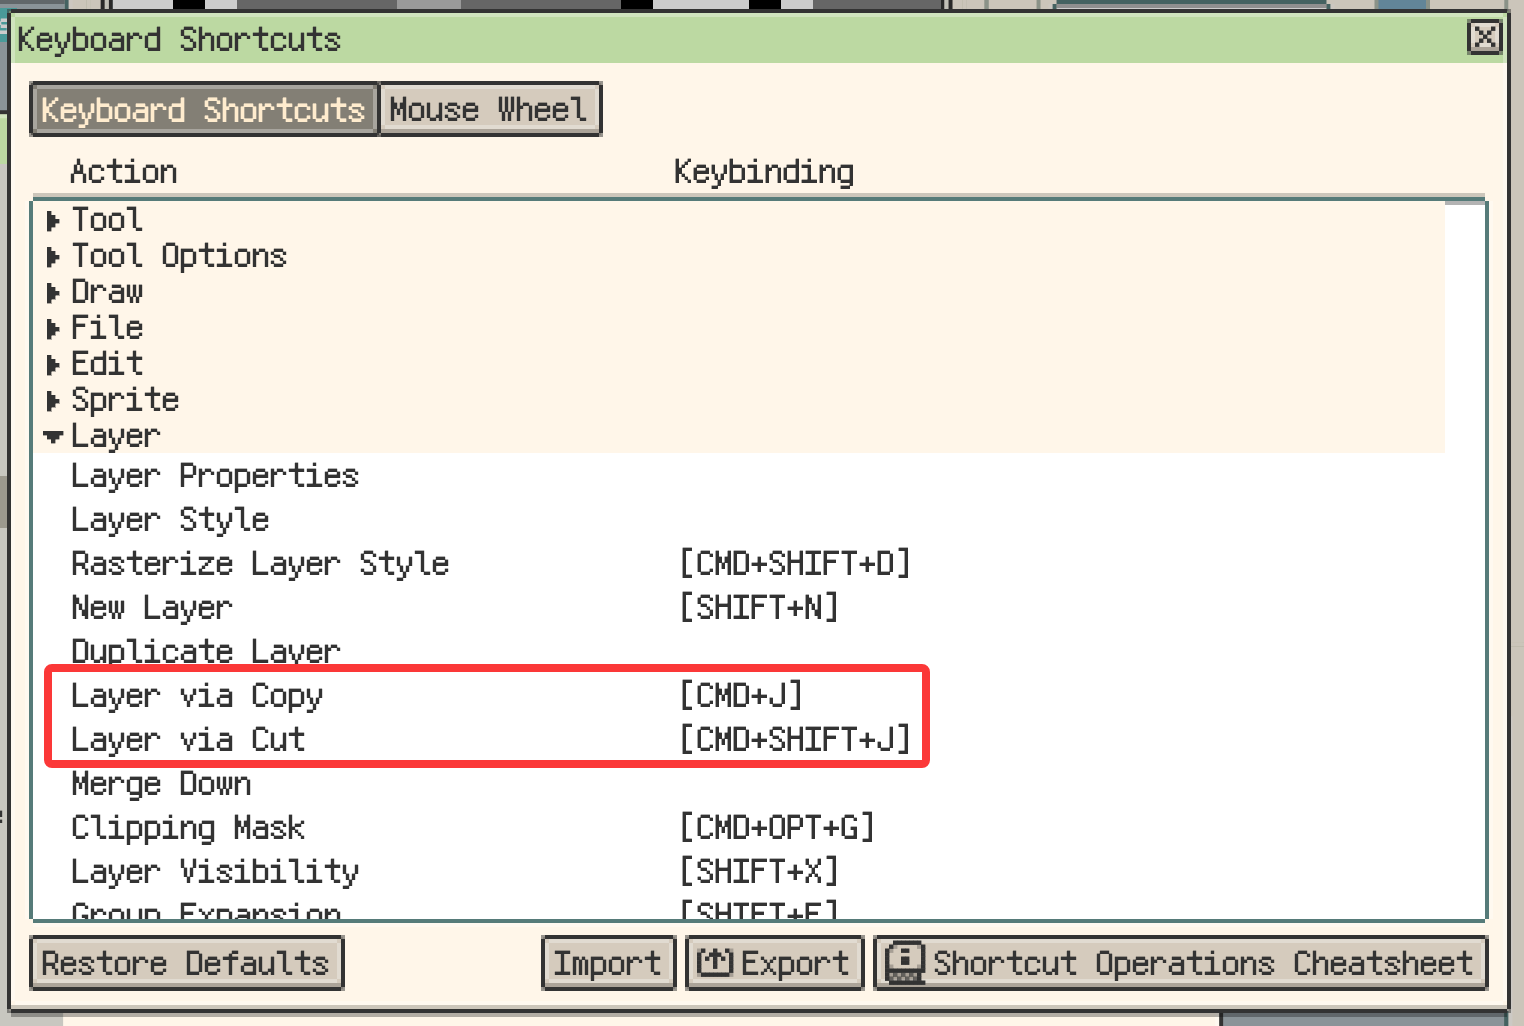
On desktop and Android v1.31.1+, selections also support Layer via Copy and Layer via Cut.
- Layer via Copy creates a new layer from the selected pixels and leaves the source layer unchanged.
- Layer via Cut creates a new layer from the selected pixels and clears that area from the source layer.
- The default shortcuts are Cmd/Ctrl+J and Shift+Cmd/Ctrl+J.
This page is mainly about editing the content you are currently working on. If you need timeline-level multi-cell workflows or larger cross-file structure editing, the timeline pages are a better fit.
Fill, Stroke, and Inserted Content
This group is for quick edits you want to apply immediately to the current content.
Fill and Stroke
- Fill: if a selection is active, only the selection is filled. Otherwise, the current cell is filled.
- Stroke: requires a selection first. It draws a 1-pixel border along the current selection edge.
- When to use them: Fill is better for blocking in a base color or resetting an area. Stroke is better for reinforcing an existing outline.
The GIF below shows the difference between filling the whole current cell and stroking only the active selection.
Insert Image and Insert Text
- Insert Image places external artwork directly into the current document.
- On mobile, you usually choose a source first. On iOS, that can be Photos, Files, or the clipboard.
- On desktop, Edit ▸ Insert Image usually opens a local file picker directly.
- Large images: if the source image is much larger than the canvas, later moving and editing may feel heavier.
Insert Text also lives in the Edit menu, but text has its own page. Continue with Insert Text.
Flip, Rotate, and Transform
These commands all belong to a “select content first, then transform it” workflow.
- Flip Horizontal / Vertical: if a selection is active, the selected content is flipped directly.
- Without a selection: the command falls back to the current cell content. If you already have timeline cells selected, the currently selected content can also be flipped together.
- Rotate 90°: requires a transformable selection first.
- Transform: useful when you do not already have a selection. It first frames the current cell content so you can continue with transform operations from there.
If you need sprite-wide crop, flip, or rotation, go back to Sprite. Those actions belong to the Sprite menu, not to this local editing workflow.
The GIF below shows a typical “make a selection, then rotate or transform it” flow.
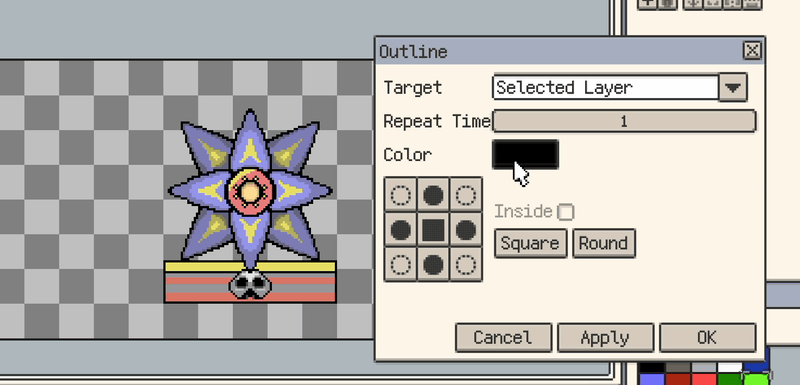
Advanced Outline
Advanced Outline is not the same thing as the simple Stroke command above.
- Stroke adds a 1-pixel border along the current selection edge.
- Advanced Outline opens a dedicated dialog for larger target ranges and more detailed outline control.
Common controls in the outline dialog include:
- Target: current cell, current frame, current layer, or the whole sprite
- Repeat Time: useful for thicker outlines
- Color: outline color
- Inside Outline: controls whether the outline expands inward or outward
- Rounded / Squared: changes the corner style
- Apply / Confirm: preview first, then commit
If you often need to outline an entire character layer or compare several thickness settings, this dialog is a better fit than the simple Stroke command.
The GIF below shows the main controls and workflow in the outline dialog.
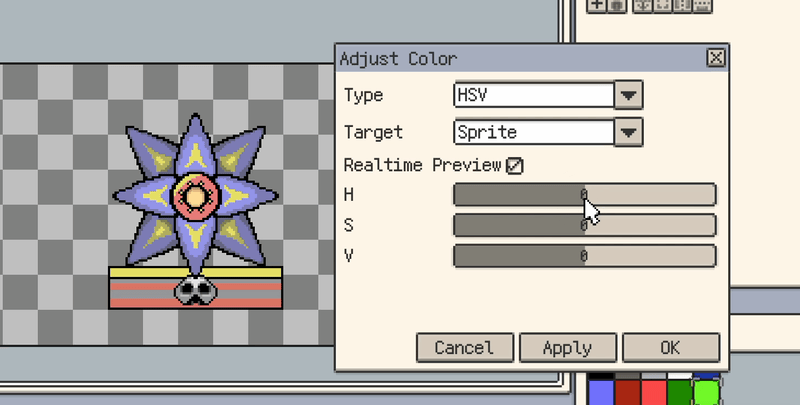
Adjust Color
Adjust Color is one of the most useful batch-edit dialogs in the Edit menu. It is not limited to the current cell. Instead, you choose a type first, then decide how large a target range you want to affect.
A common workflow looks like this:
- Choose a Type
- Choose a Target
- If a selection is active, decide whether the change should stay inside the selection
- Use Apply to preview when needed, then Confirm
Common types
Brightness and Contrast
Use this mode when you want to rebalance light and dark values without changing the overall hue structure too much.
Other useful types include:
- HSV: shifts hue, saturation, and value
- Opacity: raises or lowers transparency uniformly
- Invert / Grayscale: useful for quick global effect changes. Recent builds convert grayscale with more accurate value relationships, so saturated reds and blues keep more believable brightness.
- Replace Color: swaps one color for another, with optional tolerance
- Quantize to Palette: pulls colors back toward the current palette
- Blur: useful for softening or simple glow-like transitions
Target ranges
Not every type supports every target, but common targets include:
- current cell
- current frame
- current layer
- whole sprite
- palette
When a selection is active, you can usually also enable Selection Only to keep the change inside the selected area.
A few practical notes
- HSV, Brightness and Contrast, and Opacity are especially useful when you want to preview changes while adjusting.
- For larger ranges, it is safer to Apply first and Confirm once the result looks right.
- When the target is the palette, fewer adjustment types are available than for pixel content. For example, Blur and Quantize to Palette do not apply directly to the palette itself.
The GIF below shows a common Adjust Color workflow.