Canvas
The canvas is more than just the area where you draw. It is also where you inspect pixel edges, judge composition, and line things up with guides. This page explains how to control the canvas view and how to use grids, isometric guides, and assistant grids more effectively.
Viewing and zooming the canvas
Whether you are checking a single pixel or stepping back to review the whole composition, Resprite lets you move around the canvas with touch gestures, a mouse, or a trackpad. Desktop and Android versions also include a Zoom Tool.
If the canvas drifts off-screen or you simply want to bring it back to a more comfortable position, use the available centering controls.
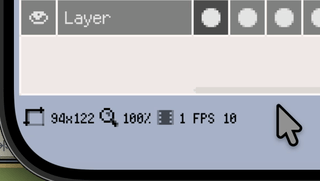
On iOS R56+, tap the zoom percentage at the bottom-right of the timeline to open a zoom slider, or long-press it to fit the current canvas into the visible area. Both actions use Resprite's existing zoom steps.
If you mainly work with touch input, continue with Gesture.
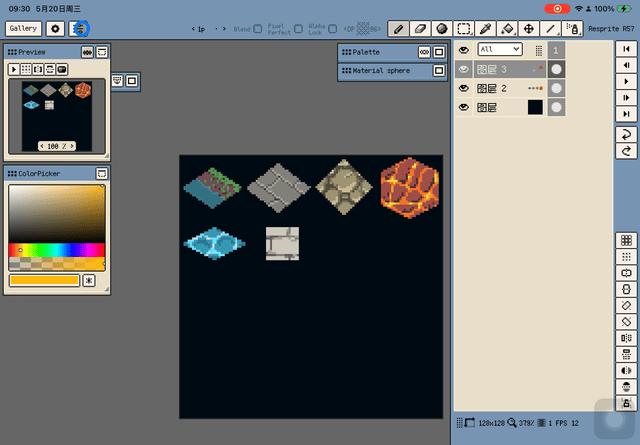
Grayscale Preview (iOS R56+, Desktop & Android v1.30.2+)
Use Grayscale Preview when you want to judge value contrast without changing the sprite's actual colours. It temporarily shows the canvas in grayscale, which is useful for checking silhouettes, readability, and shading before committing any colour adjustments.
On iOS R56+, the Preview window action bar can switch both the Preview window and the main canvas to grayscale at the same time.
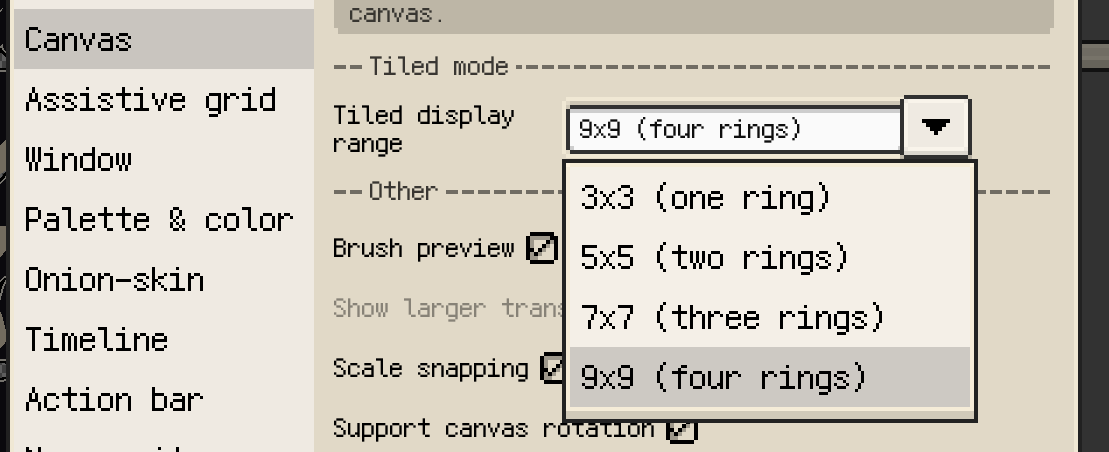
Tiled Mode Preview (iOS R57+, Desktop & Android v1.31.1+)
Tiled Mode helps you preview how artwork repeats while you draw. It is useful for game floors, terrain pieces, repeating backgrounds, and any asset where seams matter.
On iOS R57+ and desktop / Android v1.31.1+, Preferences ▸ Canvas can control the Tiled Mode display range. The main canvas, Preview window, and brush preview use the same range so you can inspect the repeat consistently while drawing:
3x3: one ring around the original tile5x5: two rings7x7: three rings9x9: four rings
On iOS R57, the default range is 5x5.
Tiled Mode also supports isometric diamond and hexagonal Tile Profiles, so non-rectangular tile assets can be checked in a preview closer to their final layout. On iOS R57+, drawing and fill can continue across tile boundaries in these profiles.
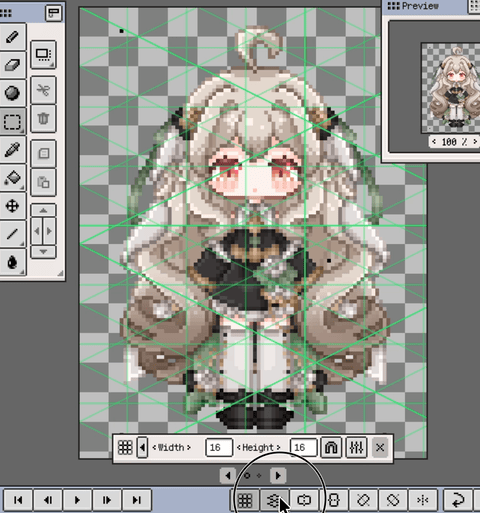
Grid lines and pixel grid
Grid overlays can be turned on from the available view controls. In interfaces with a View menu, you can toggle them there. On touch-focused layouts, the action bar or the grid panel above the canvas provides quicker access.
Grid width, height, and offset belong to the current document, so you will usually adjust them directly from the grid panel above the canvas. When space is limited, the same values are grouped into a parameter dialog.
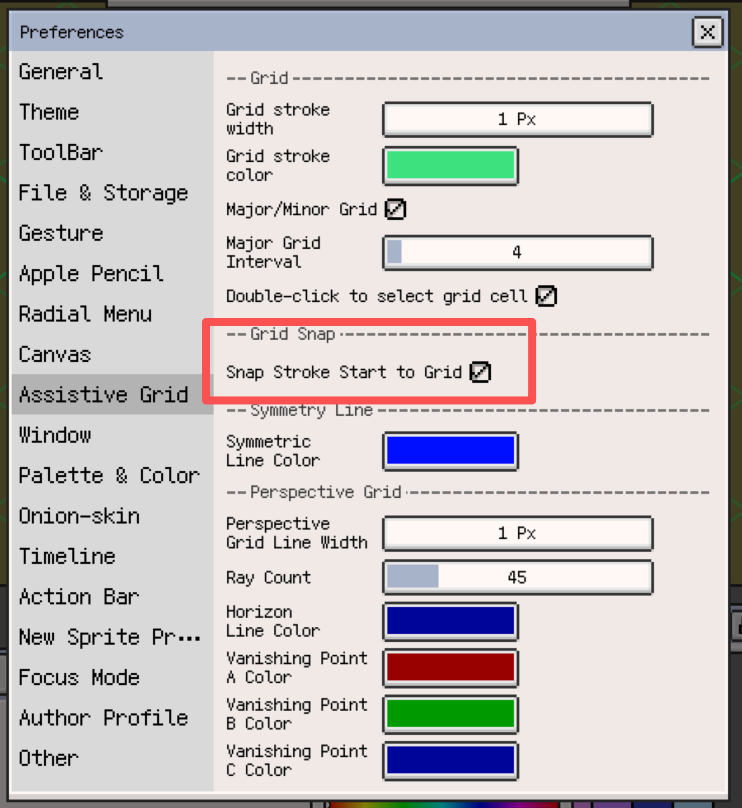
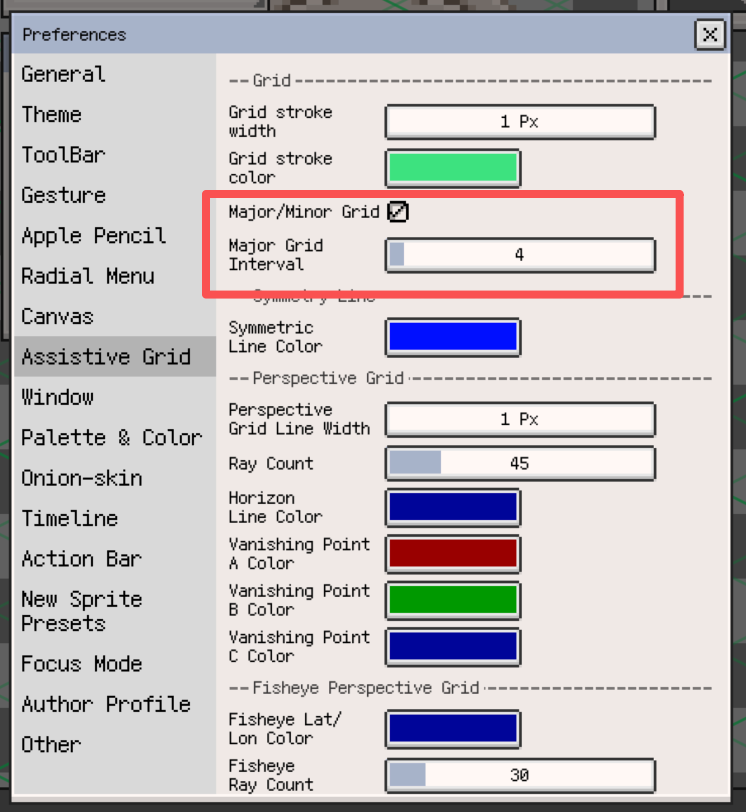
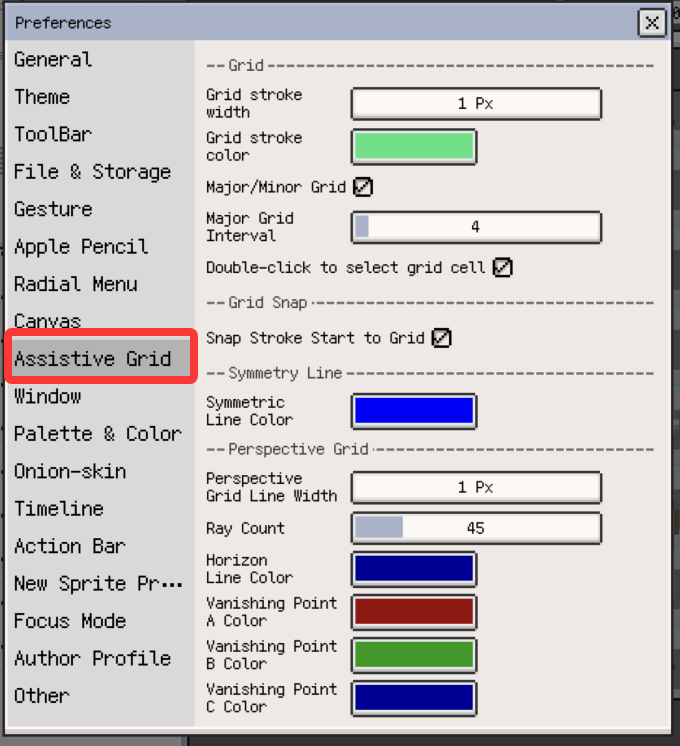
Use Preferences ▸ Assistant grids for the supporting options:
- Stroke width
- Colour, including transparent guide colours
- Major/minor grid display
- Double-click to select a grid cell
- Start-point snapping and related grid behaviour
When you need to inspect 1x1 pixel boundaries, enable Show Pixel Grid. It appears only after you zoom in far enough, making it useful for edge cleanup, pixel-perfect alignment, and single-pixel checks.
Grid snapping & grid controls
With grid snapping enabled, Resprite aligns strokes and shape anchors to the active grid so you can place pixels and construction lines more consistently.
When a grid is visible, you can also double-click or double-tap a grid cell to select that cell quickly.
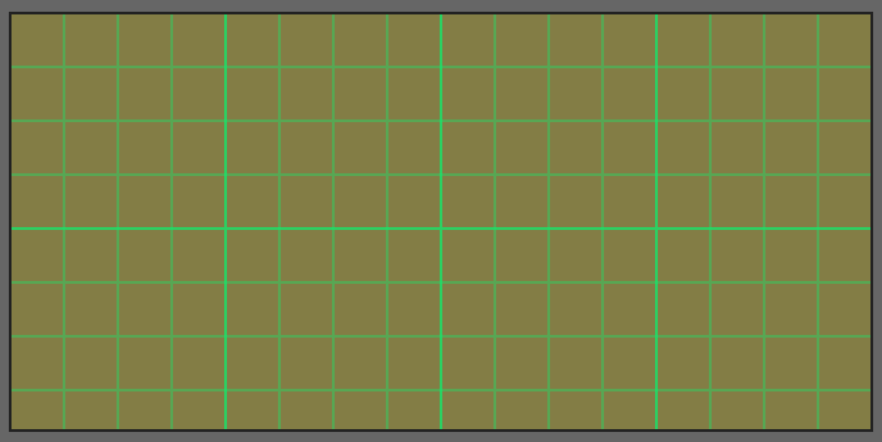
For clearer guides across different scales, enable major/minor grid display. You can also offset both rectangular and isometric grids to match your sprite origin more precisely.

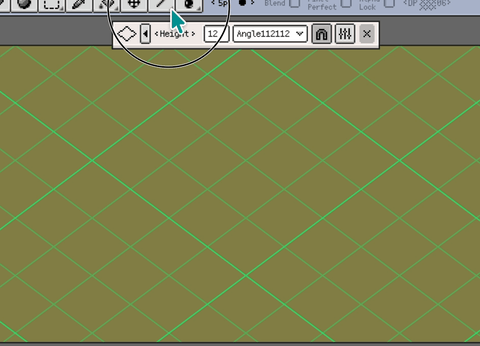
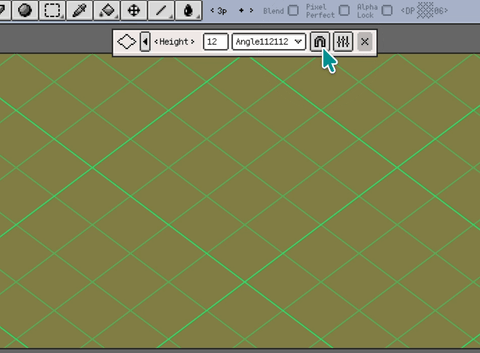
Isometric guides
Isometric grids can be enabled from the same view controls and are useful when building isometric scenes or tiles.
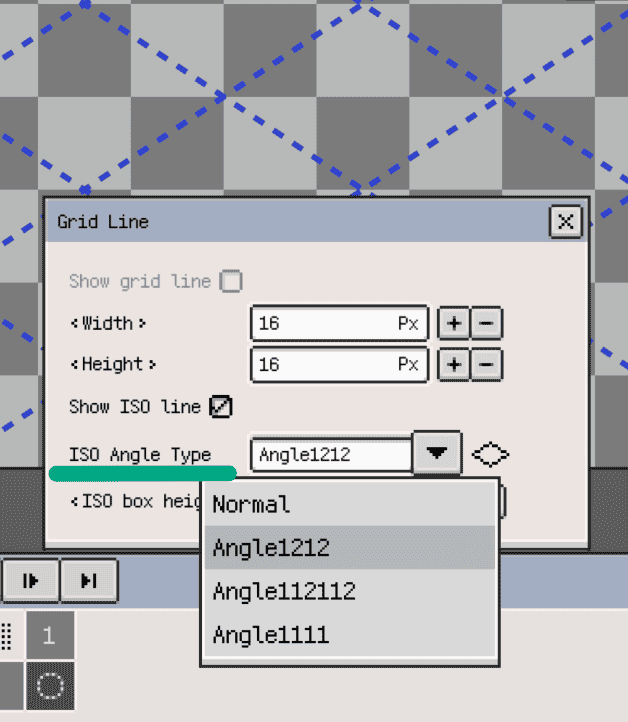
Isometric height, offset, and angle type are usually adjusted from the isometric grid panel or its parameter dialog. The isometric guide uses the same colour as the regular grid so both stay visually consistent.
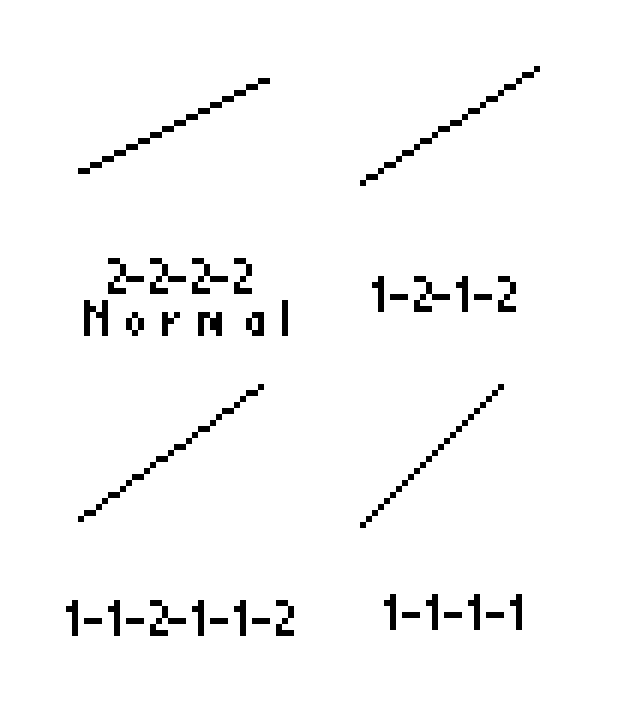
Resprite also supports multiple ISO angle types to match different isometric styles.
Assistant grids
Use Preferences ▸ Assistant grids to configure perspective-guide preferences and related helper settings.
- Adjust line count, line weight, and colours so the guides stay readable without taking over the artwork.
- Perspective grids support one-point, two-point, three-point, and fisheye modes; switch the active mode from the perspective grid panel on the canvas.
- Combine perspective grids with regular grids or isometric guides when you need more structured layouts.
- Moving perspective guides or the symmetry tool is undoable, so it is easy to experiment.

Canvas preferences
Use Preferences ▸ Canvas to fine-tune display-related canvas options, such as:
- Show Pixel Grid and the zoom threshold where it appears
- The checkerboard colours and square size used to show transparency
Use Preferences ▸ Assistant grids for grid, snapping, and perspective preferences. Per-document values such as grid size, offsets, isometric height, and ISO angle are adjusted directly from the canvas-side grid panels.

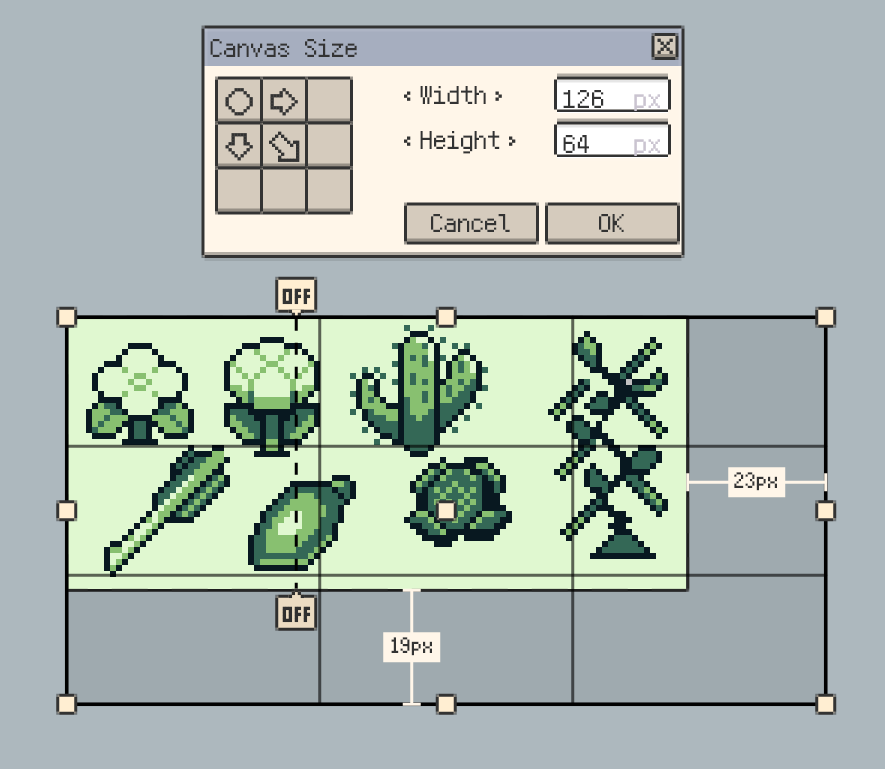
Change canvas size
Choose Menu ▸ Sprite ▸ Canvas size to adjust width and height without scaling the existing pixels. The preview helps you pad or crop with a clear sense of how the new bounds relate to the current artwork.
Use Canvas size when you want to add margin, extend an edge, or trim the canvas. Use Sprite size when you need to scale the artwork itself.
Interactive canvas resizing is also supported.
For other sprite-wide operations such as Sprite size, Rotate / Flip canvas, Crop to canvas, or Trim, continue with Create and Configure Sprites. For local adjustments, see Editing.
Further reading
- Gesture: touch and stylus navigation
- Create and Configure Sprites: global sprite and canvas operations
- Editing: selection-based edits and local transforms