Resprite DA Timelapse Recording Tutorial
We've added a new feature in Resprite DA v1.27.1: Timelapse Recording. In other software, it's also known as process recording, drawing playback, etc.
This feature allows you to automatically record your creative process while drawing pixel art and export it as a video file.
This is very useful for recording and sharing your creation process.
Enable Timelapse Recording When Creating a New Sprite
When creating a new sprite, check the "Enable Timelapse Recording" option.
![]()
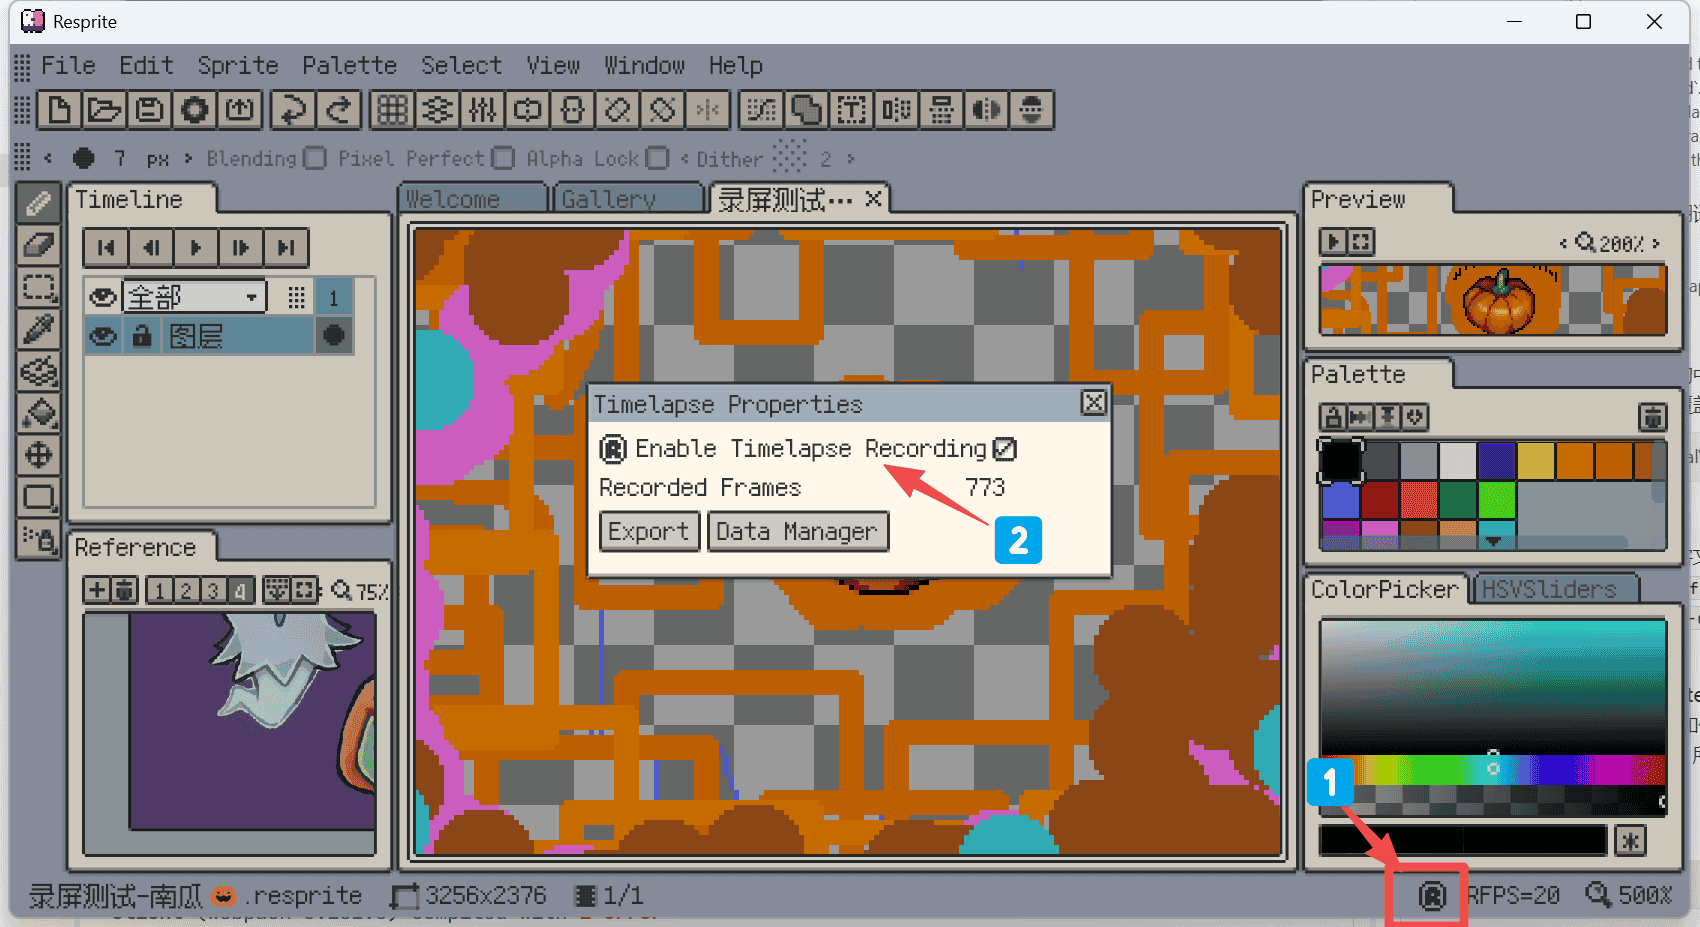
Enable or Disable Timelapse Recording for Existing Files
For existing files, you can click the [R] Recording Status Icon in the bottom right corner, or go to Menu -> Sprite -> Timelapse Properties to open the Timelapse Properties dialog, where you can enable or disable recording. Inside, you can also view the number of recorded frames and access the export and data manager.
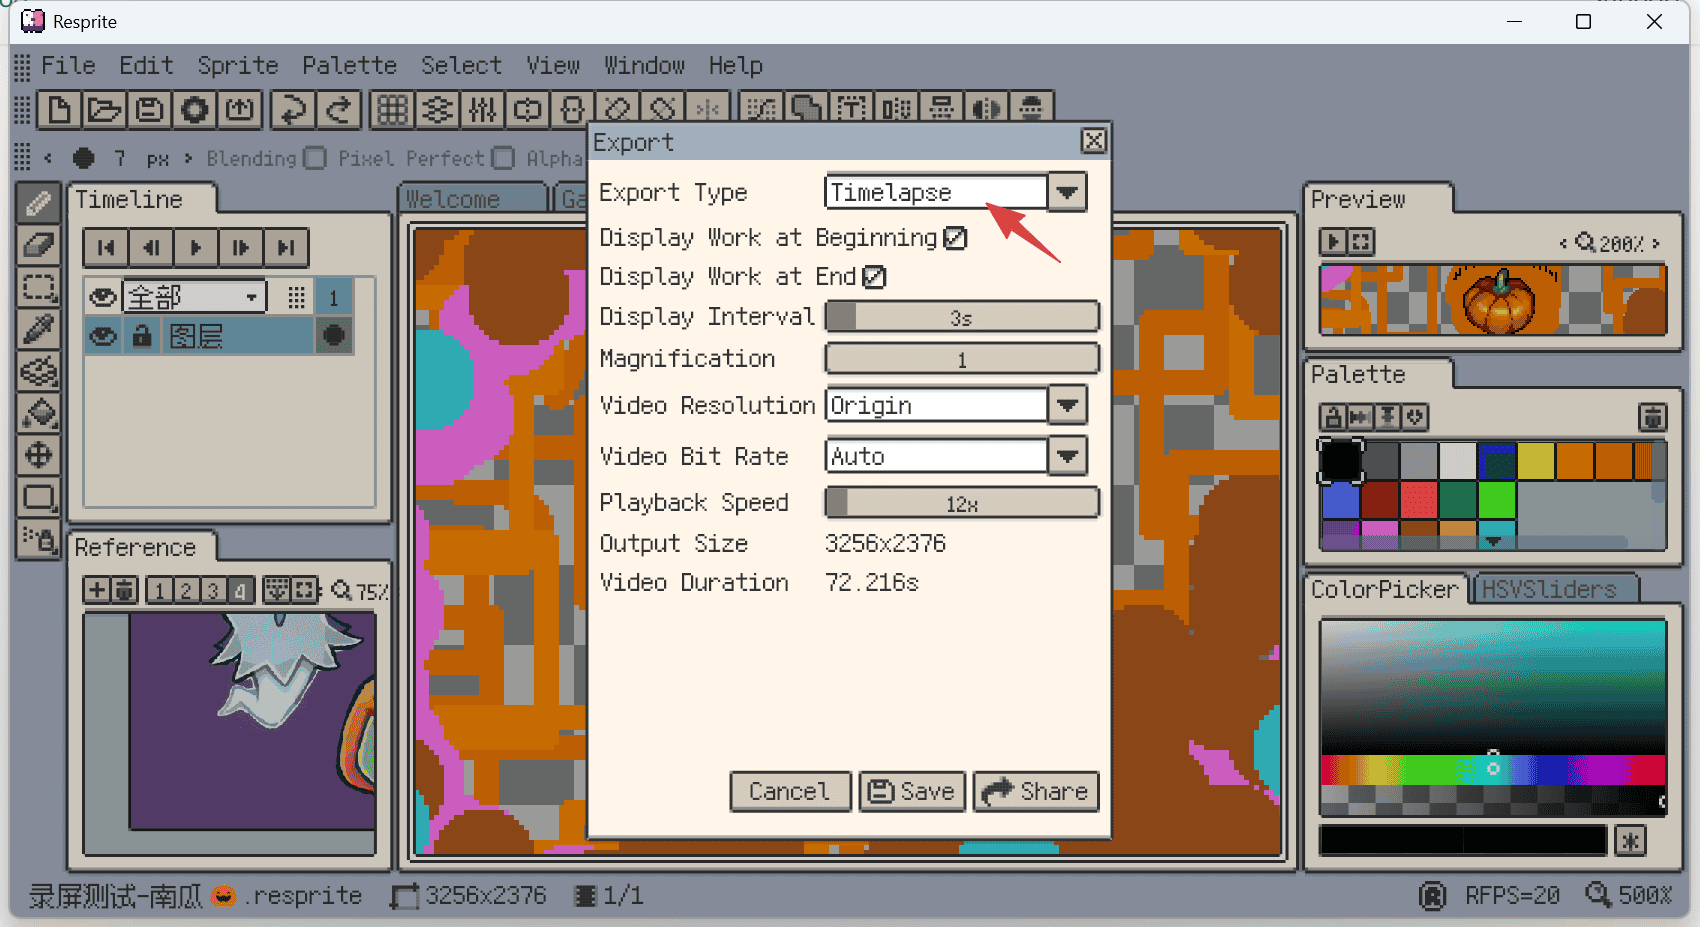
Exporting the Process Video
You can click the export button in the Timelapse Properties dialog above, or go to Menu -> File -> Export -> Timelapse to enter the Timelapse Export dialog.
In the dialog, you can set several properties:
- Show artwork at the beginning/end: When enabled, the final artwork will be displayed at the beginning and end of the video.
- Video Resolution: By default, it's the same resolution as the sprite file. You can adjust the video resolution as needed.
- Video Bitrate: The default is automatic mode. You can manually select a level; the higher the level, the clearer the video and the larger the file size.
- Playback Speed: Use this to adjust the fast-forward speed. It will affect the video duration, which can be seen at the bottom.
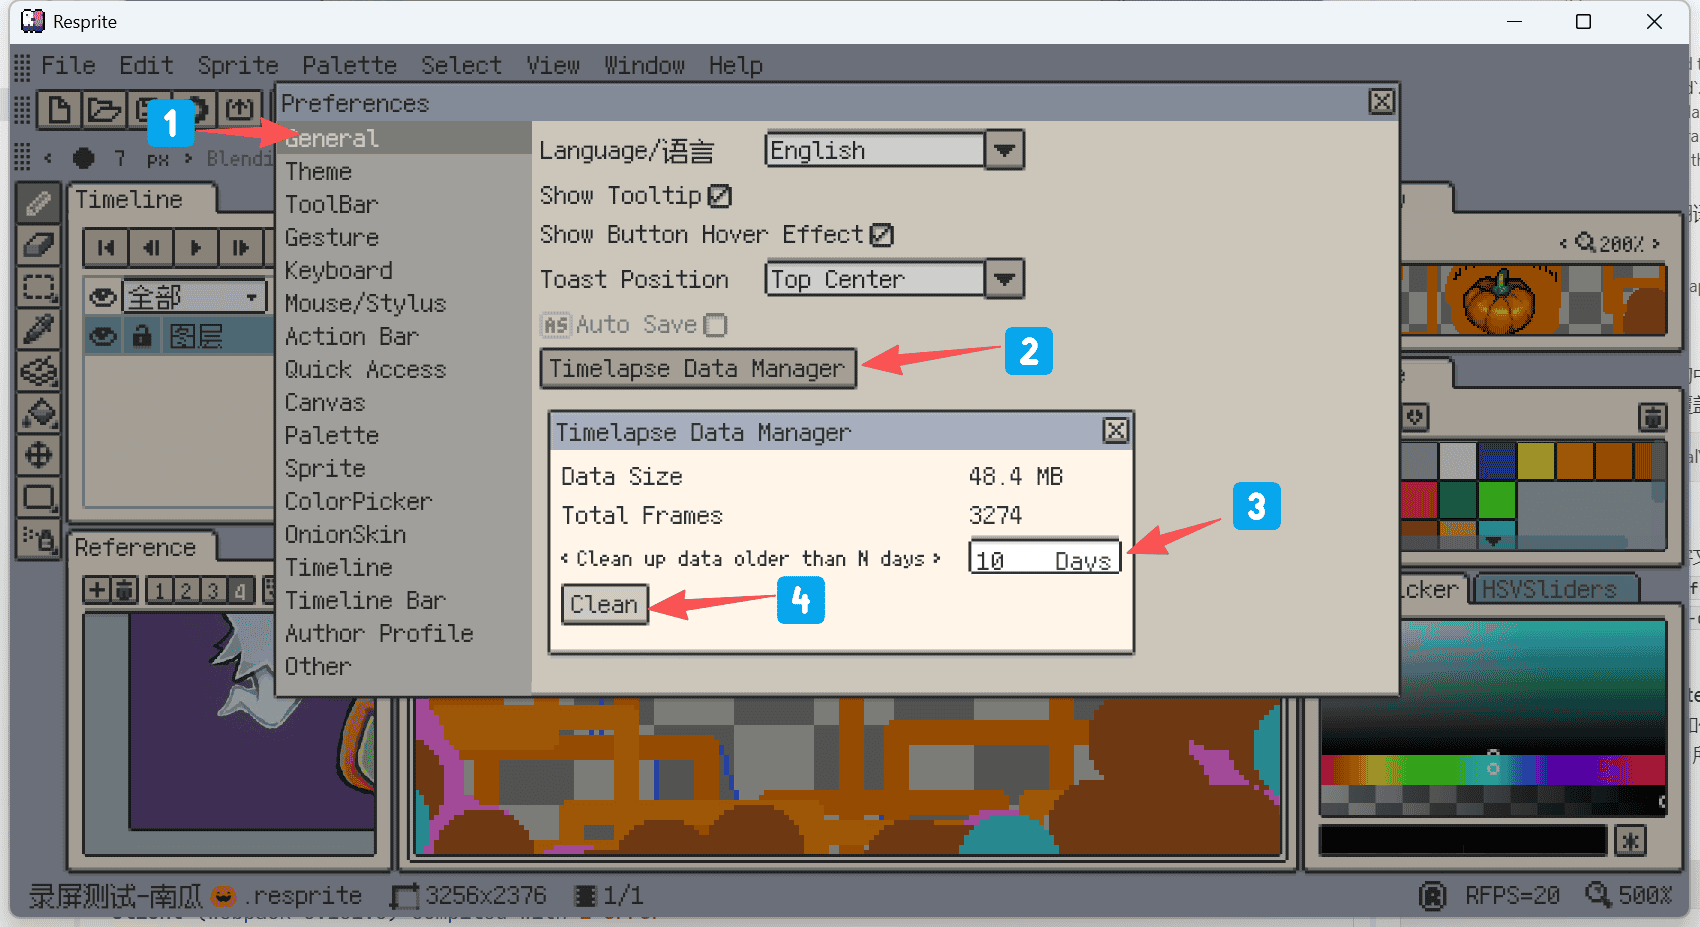
Cleaning Up Recording Data
Go to Settings -> General, open the Timelapse Data Manager, set the number of days to clean up, and click the clean button to execute.